Playful Baby Shower Treats: Polka Dot Cookies with Colorful Icing
The Starving Chef is supported by Hungry People like you. When you make a purchase through an affiliate link on my site, I may earn a little bit of cash on the side (at no extra cost to you) to help keep my kitchen running. Read our disclosures here.
What’s up, Hungry People?
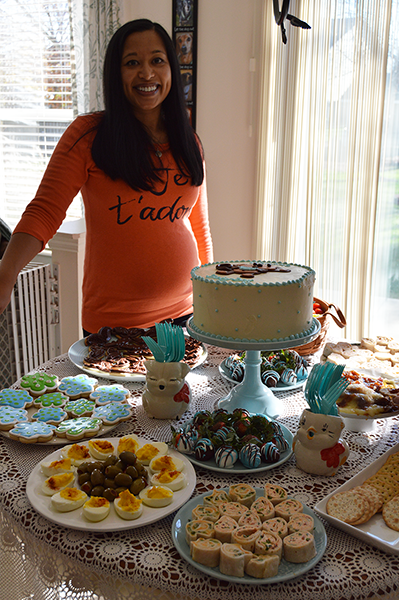
Today, I have a delightful recipe that’s perfect for celebrating a special occasion like a baby shower. Don’t worry, I’m not the one expecting – it’s my lovely sister! My mom and dad couldn’t be happier about becoming grandparents, so they threw a fabulous baby shower for her.
And of course, I couldn’t resist adding my own touch to the event by preparing some delicious treats in true Starving Chef style. Alongside the mouthwatering chipotle chicken roll-ups, I whipped up these unbelievably simple sugar cookies and gave them an adorable decoration!
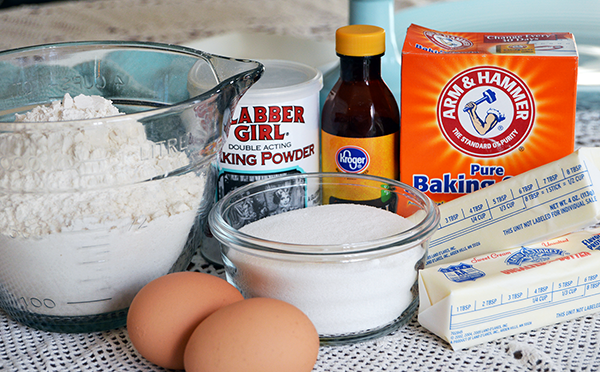
Here’s What You Need
- Flour: Provides structure and texture to the cookies.
- Sugar: Adds sweetness and contributes to the texture and browning of the cookies.
- Butter: Adds richness and flavor to the cookies.
- Baking powder: Helps the cookies rise and become light and fluffy.
- Baking soda: Helps the cookies rise and gives them a tender texture.
- Vanilla extract: Enhances the flavor of the cookies.
- Salt: Balances the flavors and enhances the overall taste of the cookies.
- Powdered sugar: Creates the base for the icing and provides sweetness.
- Meringue powder: Helps stabilize and add volume to the icing.
- Cream of tartar: Helps stabilize the meringue powder and adds acidity for structure.
- Water: Used to thin out the icing and achieve the desired consistency.
- Food coloring: Adds color and visual appeal to the icing.
Let’s Cook!
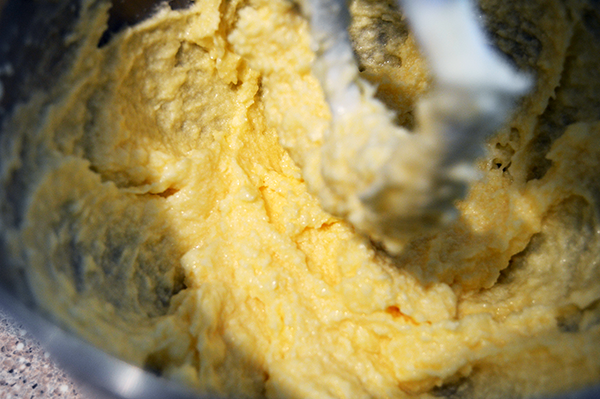
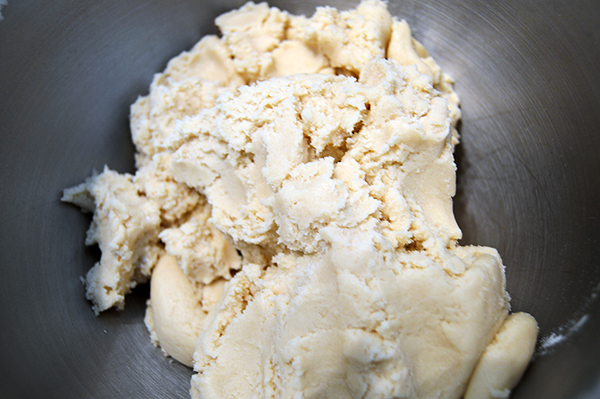
To get started, we need a super easy cookie dough. Cream together some butter, eggs, and sugar until they become light and fluffy. Then, gradually add the flour, salt, baking powder, and baking soda. Mix everything until a thick, non-sticky dough forms.
Now, here’s a neat trick to keep your cookie dough from drying out while you work with the first half. Divide the dough in half, setting one portion aside in a bowl covered with a damp towel. This way, you can ensure that the dough remains perfectly fresh.
Shaping and Baking
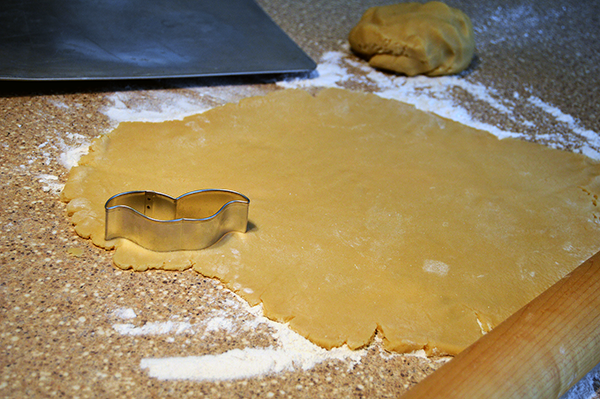
On a floured surface, roll out the dough to a thickness of about 1/4 to 1/2 inches. Take your favorite cookie cutter shape and press it into the dough to create your cookies. Don’t worry if you have some leftover dough between the cutouts. Simply gather those scraps, roll them back together, and roll out the dough again until you’ve used it all up. Repeat the process with the second half of the dough.
Place the cookies on a baking sheet and bake them for 6-8 minutes, or until they have risen and are just starting to brown at the edges. Once baked, allow the cookies to cool completely before moving on to the fun part – icing!
Icing and Decorating
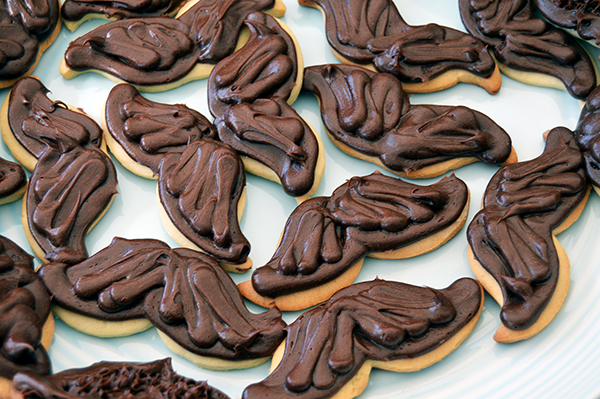
For the first set of cookies, which have a charming mustache shape, I decided to go with a classic chocolate icing. As for the flower-shaped cookies, I wanted to try something new: flooding! It was my first attempt, and I must admit, I don’t recommend doing it for the first time on a big event day. Luckily, I managed to pull it off with only a few mishaps. Although I didn’t have enough time for the cookies to dry completely, no one seemed to notice, as they were too busy fawning over my sister’s adorable baby bump.
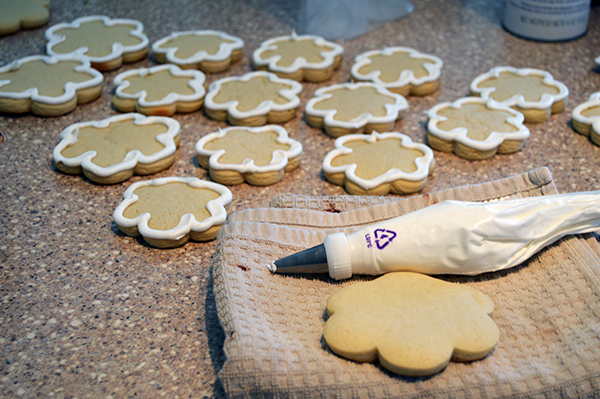
To start the flooding process, prepare a thick royal icing. Take about a cup of the icing and put it into a piping bag to outline the edges of the cookies. You can choose to add color to this icing, but I kept mine white. Feel free to get creative and add colors that match your party theme.
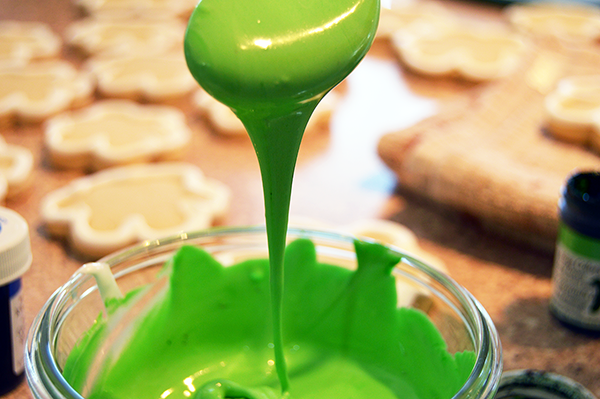
With the remaining icing, add a few tablespoons of water to thin it out. The consistency you’re aiming for is what I like to call the ‘5-second rule.’ When you pour the icing back into the bowl, it should disappear within 5 seconds. At this point, you can add colors to your icings and transfer them into squeeze bottles for easy application.
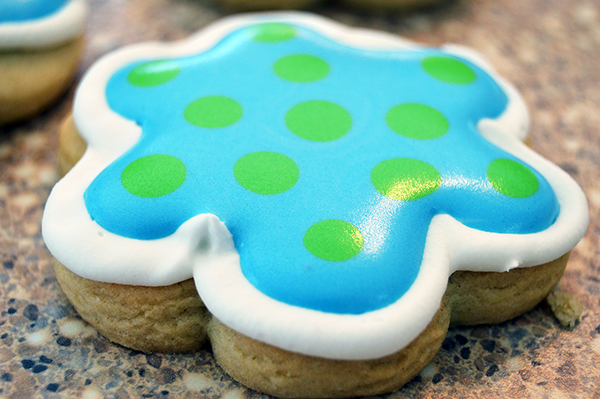
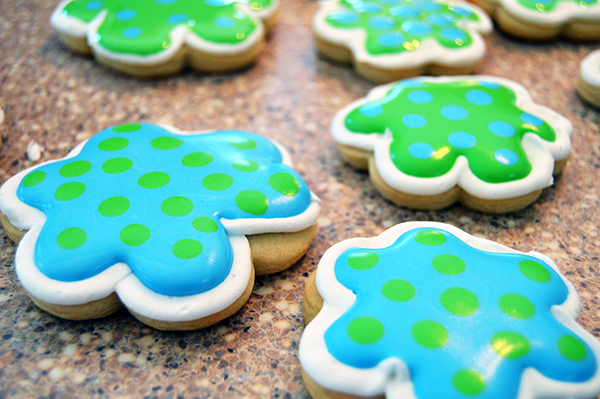
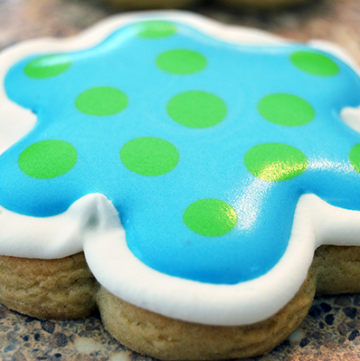
Now comes the fun part – flooding the cookies! Start from the center and work your way out to the edges. If you notice any gaps, use a toothpick to fill them in. Since I was running short on time, I went for a simple yet lovely design – polka dots!
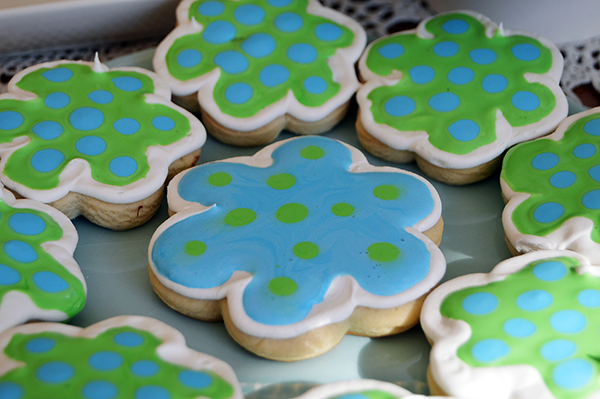
I used a technique called “wet-on-wet” to flood and decorate the cookies. Allow the icing to dry completely, and you’ll notice a matte appearance with very little sheen when it’s ready.
Tips for Making Flooded Cookies
- Creaming the butter and sugar: Make sure to cream the butter and sugar together until light and fluffy for a tender and well-incorporated cookie dough.
- Gradually add dry ingredients: Slowly add the dry ingredients to the creamed mixture to prevent clumps and ensure a smooth dough.
- Rolling out the dough: Flour the surface well when rolling out the dough to prevent sticking and achieve the desired thickness.
- Cookie cutter leftovers: Gather the leftover dough scraps, gently knead them together, and roll out again to minimize waste and make more cookies.
- Cooling the cookies: Allow the cookies to cool completely on a wire rack before icing to prevent the icing from melting.
- Consistency of icing: Adjust the consistency of the icing by adding water gradually, one teaspoon at a time, until it reaches a smooth and pourable consistency.
- Lining the cookie edges: Use a piping bag to line the edges of each cookie with icing. This helps create a defined border and prevents the flooded icing from spreading too much.
- Thinning the icing: Add a few tablespoons of water to the remaining icing to thin it out for flooding the cookies. The icing should be thick but runny enough to form a smooth surface within 5 seconds.
- Flooding technique: Start in the center of each cookie and slowly spiral out or follow the shape of the cookie with the thinned icing, filling the surface evenly.
- Toothpick for gaps: Use a toothpick to fill in any gaps in the flooded icing and create precise designs like polka dots.
- Drying time: Allow the cookies to dry completely before serving. The icing should have a somewhat matte appearance and minimal sheen.
- Experiment with designs: Feel free to get creative with icing colors, designs, and patterns to personalize your cookies and make them visually appealing.
- Store in an airtight container: Keep the decorated cookies in an airtight container to maintain freshness and prevent them from getting stale.
- Have fun and enjoy the process!: Baking and decorating cookies should be a joyful experience. Don’t be afraid to experiment and embrace your creativity while making delicious treats.
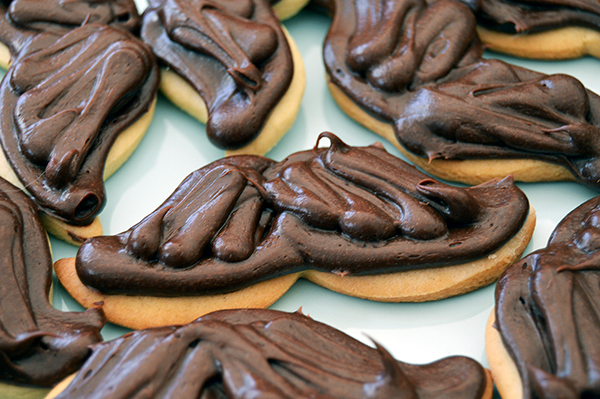
For the mustache cookies, I kept things easy and used store-bought chocolate icing to create the perfect ‘stache look.
Sweet Success and More Delights
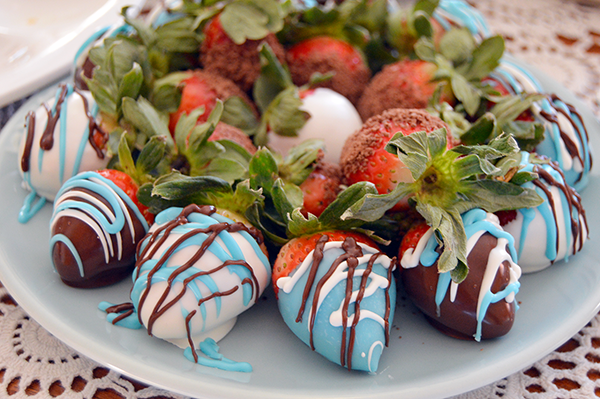
The cookies were a hit at the baby shower, but that’s not all! People couldn’t stop raving about my baby-blue chocolate-covered strawberries. Surprisingly, they were incredibly simple to make using candy melts and melted chocolate. I almost felt undeserving of all the praise for what seemed like a complicated treat!
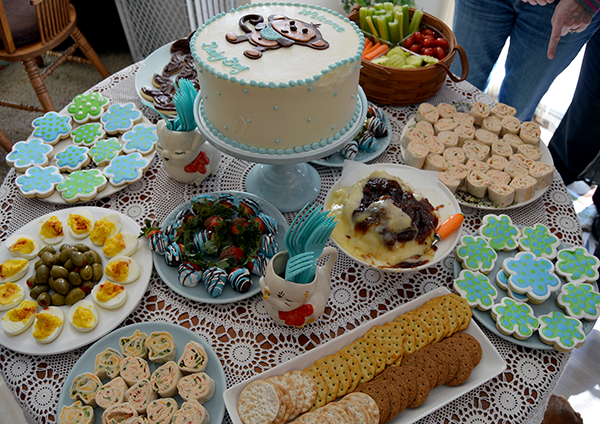
In the end, the baby shower was a scrumptious success (and no, the baby didn’t decide to make an early appearance – even better!). With the array of delectable treats, including the cookies, chipotle chicken roll-ups, baked brie with fig jelly, and the dipped strawberries, everyone left with a delightful food baby!
In conclusion, these polka dot cookies were a hit at the baby shower! The combination of simple sugar cookies and colorful icing created a delightful treat that added a touch of whimsy to the celebration.
While the process of decorating the cookies with flooding technique may require a bit of practice, the end result is worth it. Remember to have fun, experiment with different designs, and embrace your creativity.
Whether you’re hosting a baby shower or simply looking for a fun and tasty treat, these polka dot cookies are sure to impress. So go ahead, gather your ingredients, roll out the dough, and let your imagination run wild with vibrant colors and playful designs. Enjoy the process, share the joy, and indulge in these delightful treats!
Polka Dot Cookies
Equipment
- squeeze bottles one for each color
- piping bags one for each color
Ingredients
FOR COOKIES:
- 2 ½ cups flour
- 1 cup flour
- 1 cup sugar
- 1 cup butter room temperature
- 1 teaspoon baking powder
- 1 teaspoon baking soda
- 1 teaspoon vanilla extract
- pinch salt
- 2 eggs
FOR ICING:
- 5 cups powdered sugar
- 2 tablespoons meringue powder
- 1 teaspoon cream of tartar
- 3 tablespoons water + more as needed
- food coloring in desired colors
Instructions
- Preheat the oven to 400°F. In a stand mixer with the paddle attachment, cream together the butter and sugar until well combined. Add in the eggs and vanilla extract.
- In another bowl, whisk together the flour, baking powder, baking soda, and salt.
- Slowly add the dry ingredients to the creamed butter and sugar mixture until a thick dough forms.
- Divide the dough into two equal balls and place one ball in a covered bowl while working with the other.
- On a floured surface, roll out the dough to about a quarter inch thickness.
- Use a cookie cutter to cut out desired shapes from the dough. Arrange the cookies on a baking sheet.
- Bake the cookies for 6-8 minutes, or until they are puffy and beginning to brown.
- Allow the cookies to cool completely before icing.
- To prepare the icing, combine the powdered sugar, meringue powder, cream of tartar, and 3 tablespoons of water in a bowl. Use a hand mixer to combine the ingredients until smooth and thick. Add more water as needed, one teaspoon at a time, until the icing reaches a smooth consistency.
- Transfer about 1/2 cup of the icing (colored if desired) into a piping bag and use it to line the edges of each cookie.
- Divide the remaining icing into smaller bowls and add food coloring to each bowl to achieve the desired colors.
- Thin out the icing in the smaller bowls by adding a few tablespoons of water. The icing should be thick but just runny enough to form a smooth surface within 5 seconds when poured back into the bowl.
- Transfer the thinned icing into squeeze bottles.
- Starting in the center of each cookie, slowly spiral out or follow the general shape of the cookie with the thinned icing, filling the surface. Use a toothpick to fill in any gaps. Create polka dots by starting in the center and working out with the opposite color of icing.
- Allow the cookies to dry completely before serving. Enjoy!