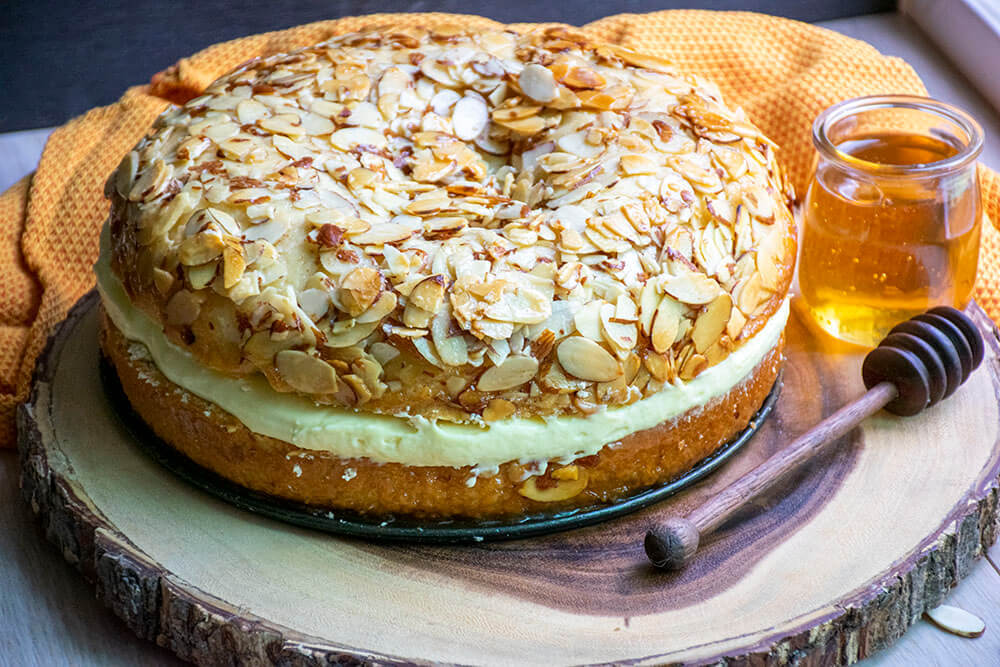
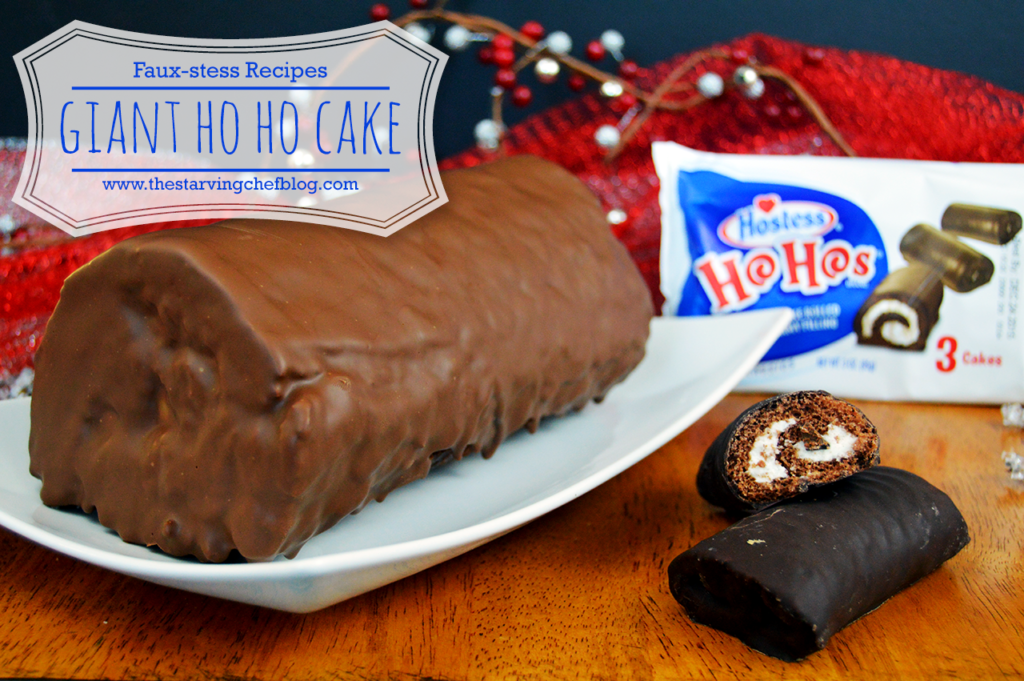
Epic Homemade GIANT Ho Hos Cake
The Starving Chef is supported by Hungry People like you. When you make a purchase through an affiliate link on my site, I may earn a little bit of cash on the side (at no extra cost to you) to help keep my kitchen running. Read our disclosures here.
What’s up, Hungry People!
Get ready for a delightful adventure with this giant Ho Ho cake. As part of this week’s challenge, where we’re focusing on creating our own versions of classic Hostess treats, I decided to go all out! Trust me, it’s worth it. And guess what? It’s easier to make than you might think, and the flavors are absolutely on point!
A Slice of Joy for Any Occasion
This giant Ho Ho cake is not just delicious but also perfect for any holiday party or special event. You’ll have no trouble slicing it into individual portions, so everyone can enjoy their own piece. No more worrying about devouring an entire giant cake in one sitting, though I won’t judge if you do!
Here’s What You Need
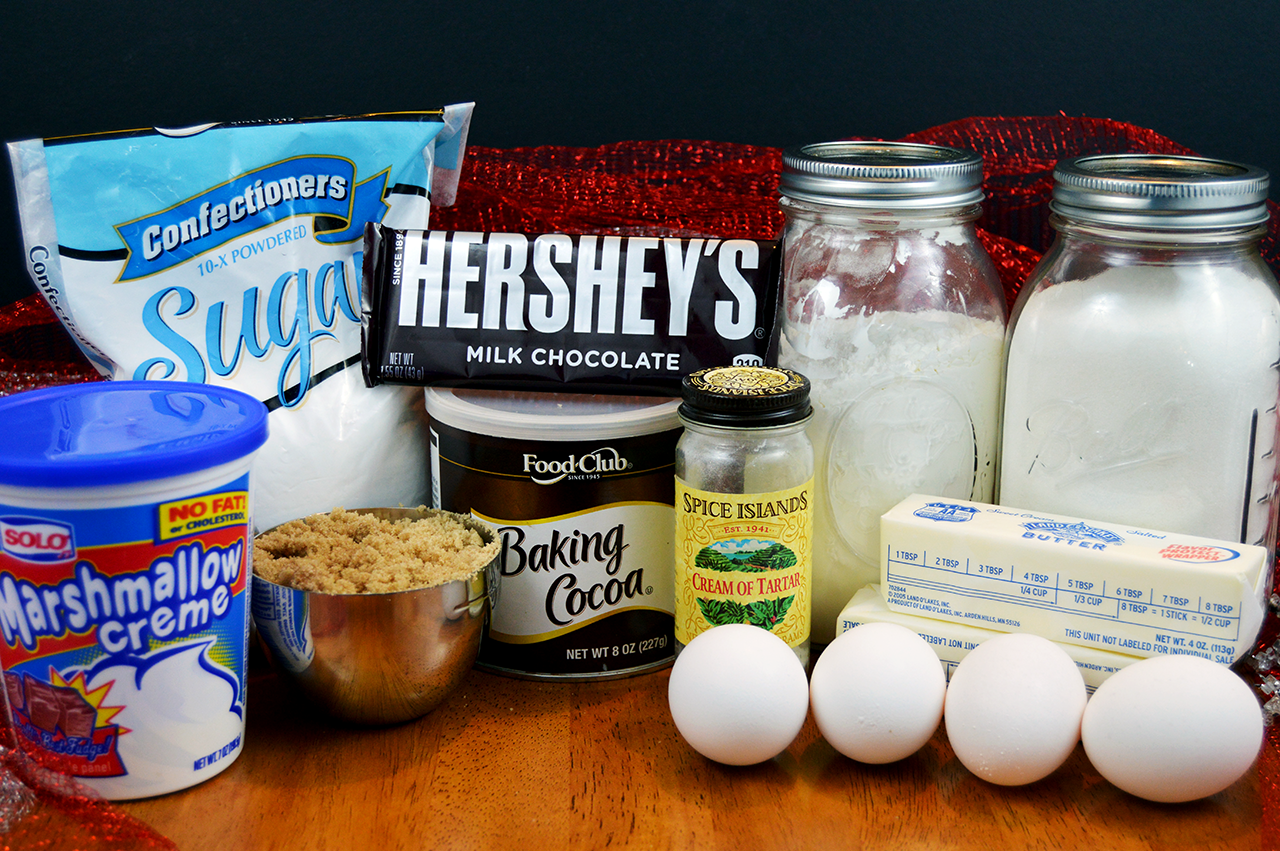
Ho Hos Cake:
- Flour: Provides structure and texture to the cake.
- Brown sugar: Adds sweetness and moisture to the cake.
- Unsweetened cocoa powder: Adds rich chocolate flavor to the cake.
- Egg whites & yolks: Provide structure and moisture to the cake batter.
- Sugar: Sweetens the egg whites and helps stabilize them when beaten.
- Baking powder: Helps the cake rise and become light and fluffy.
- Butter: Adds richness and moisture to the cake batter.
Filling:
- Powdered sugar: Sweetens and thickens the filling.
- Marshmallow fluff: Provides the creamy and fluffy texture of the filling.
- Cream of tartar (optional): Helps stabilize the filling and gives it a smoother texture.
- Meringue powder: Adds stability and structure to the filling.
- Water: Helps create the desired consistency of the filling.
Chocolate Coating:
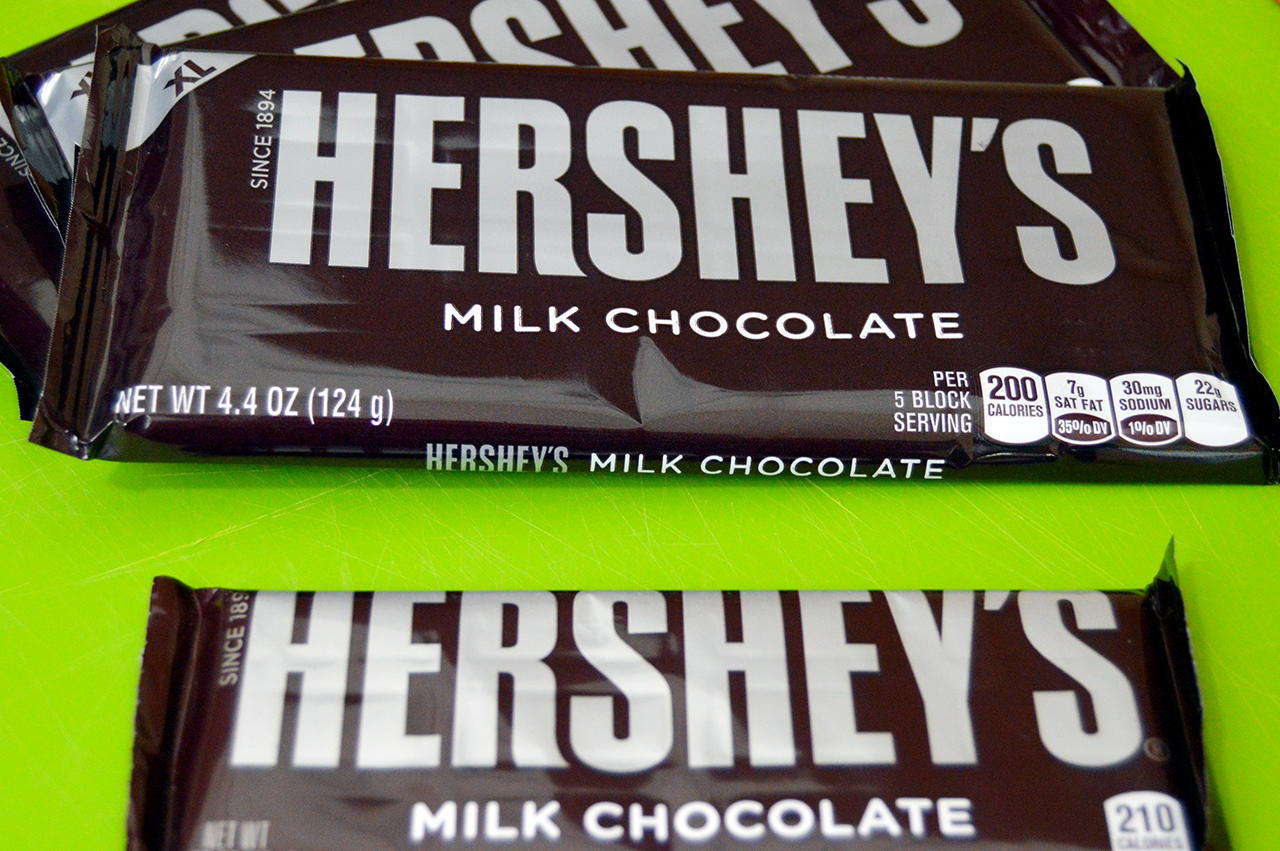
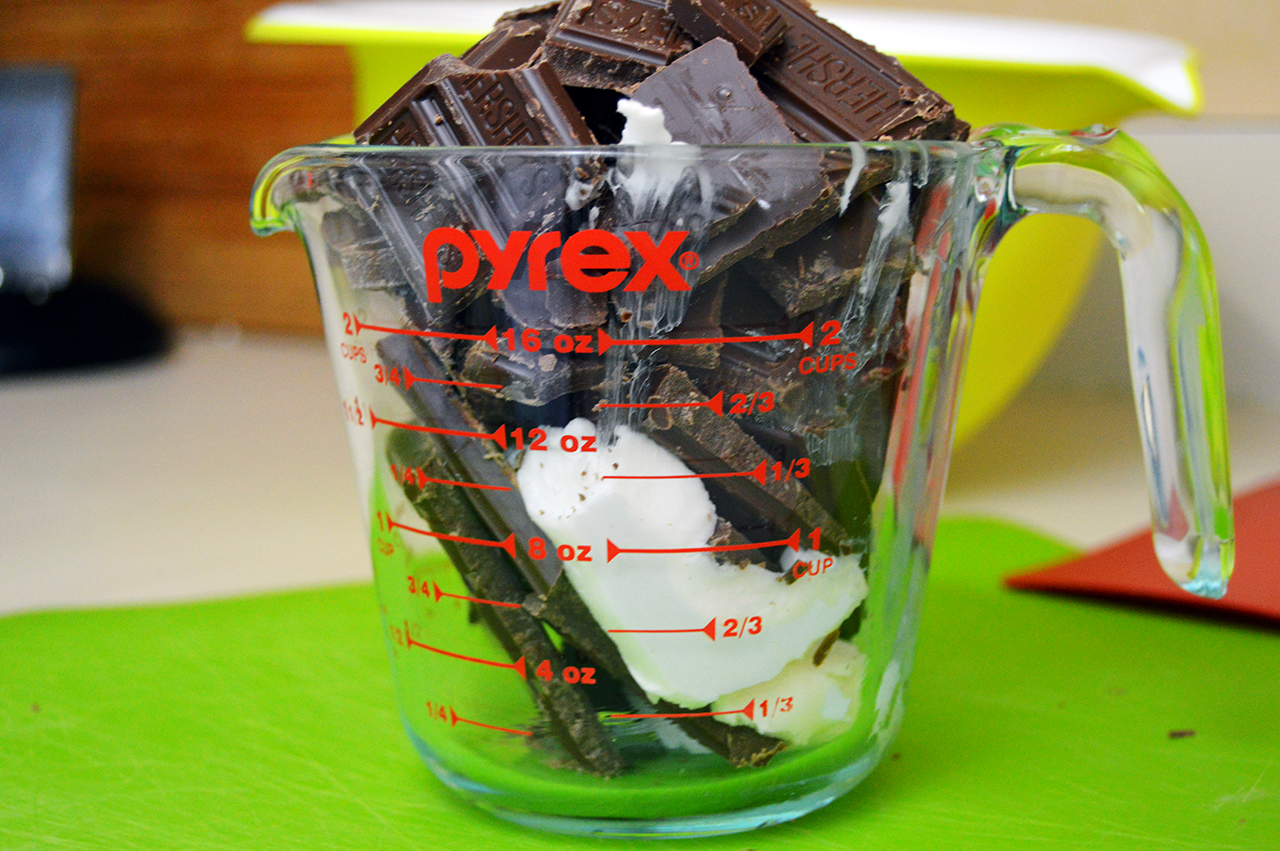
- Hershey chocolate bars: Melts to create a smooth and chocolatey coating for the cake.
- Shortening: Helps the melted chocolate set and provides a glossy finish to the coating.
Let’s Cook!
To start off on the right foot, remember that room temperature ingredients are key for most baking recipes, and this one is no exception. Make sure your butter and eggs are at room temperature before you begin. It makes a world of difference!

Mixing the Batter
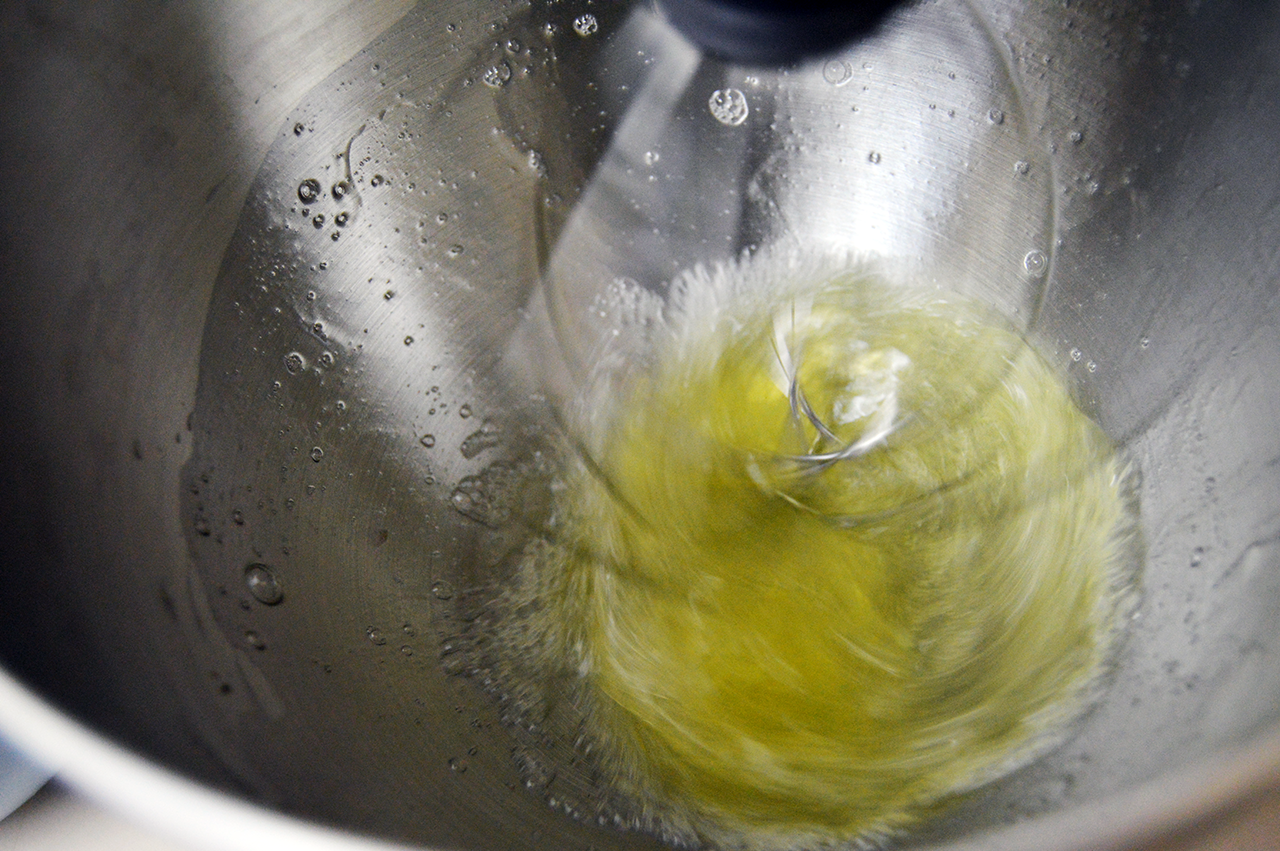
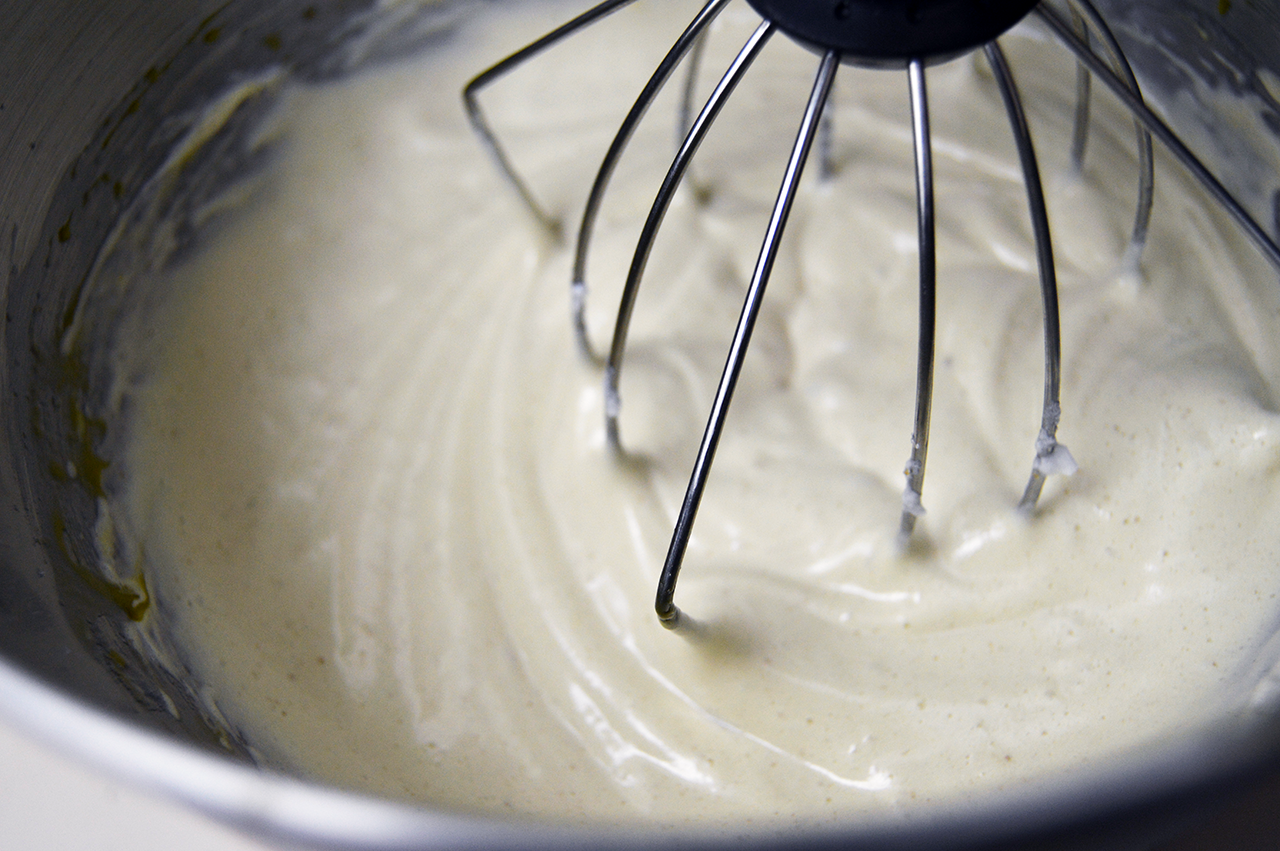
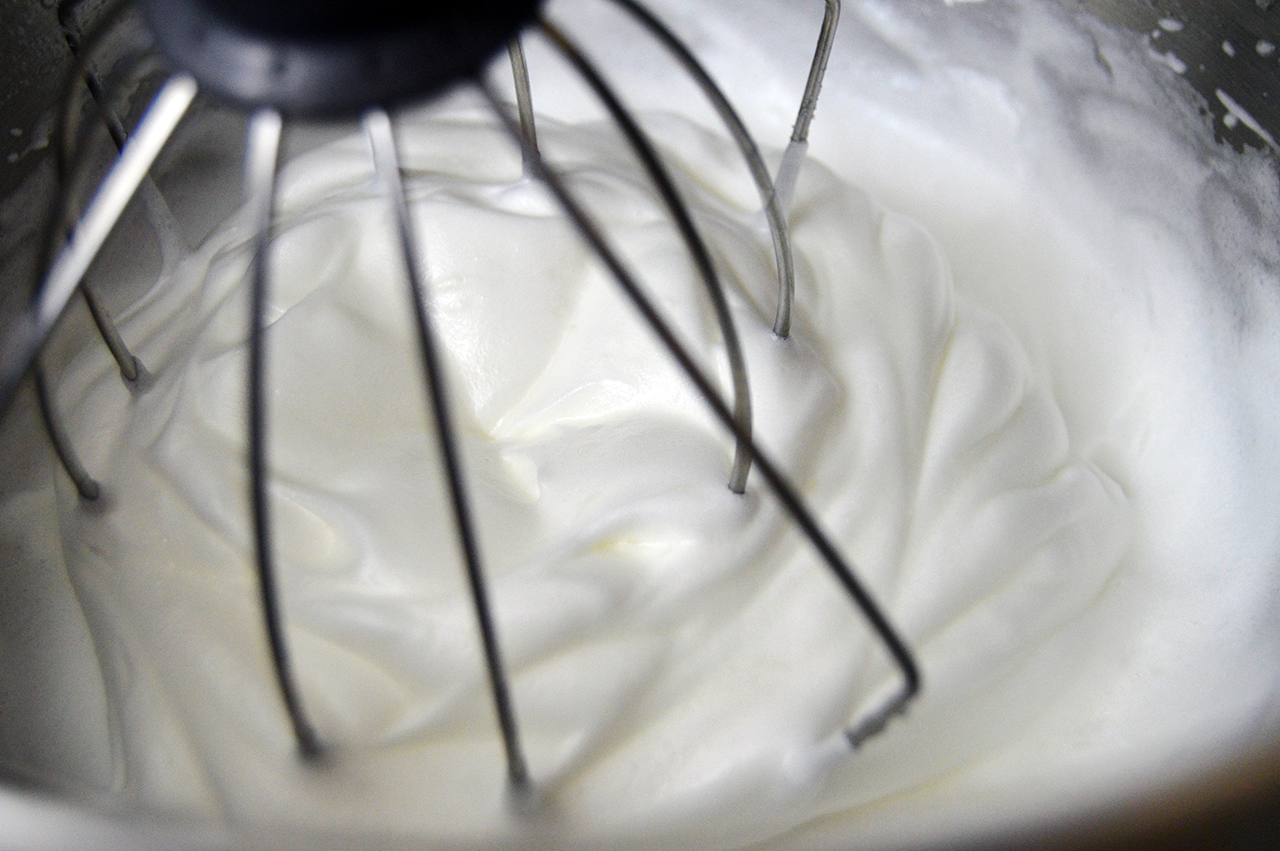
Begin by separating the egg whites and yolks. In a stand mixer, whisk the egg whites until they become light and fluffy. Gradually add the white sugar a few teaspoons at a time, continuing to whisk until stiff peaks form.
Now, slowly incorporate the brown sugar, whisking on low until it melts into the whites.
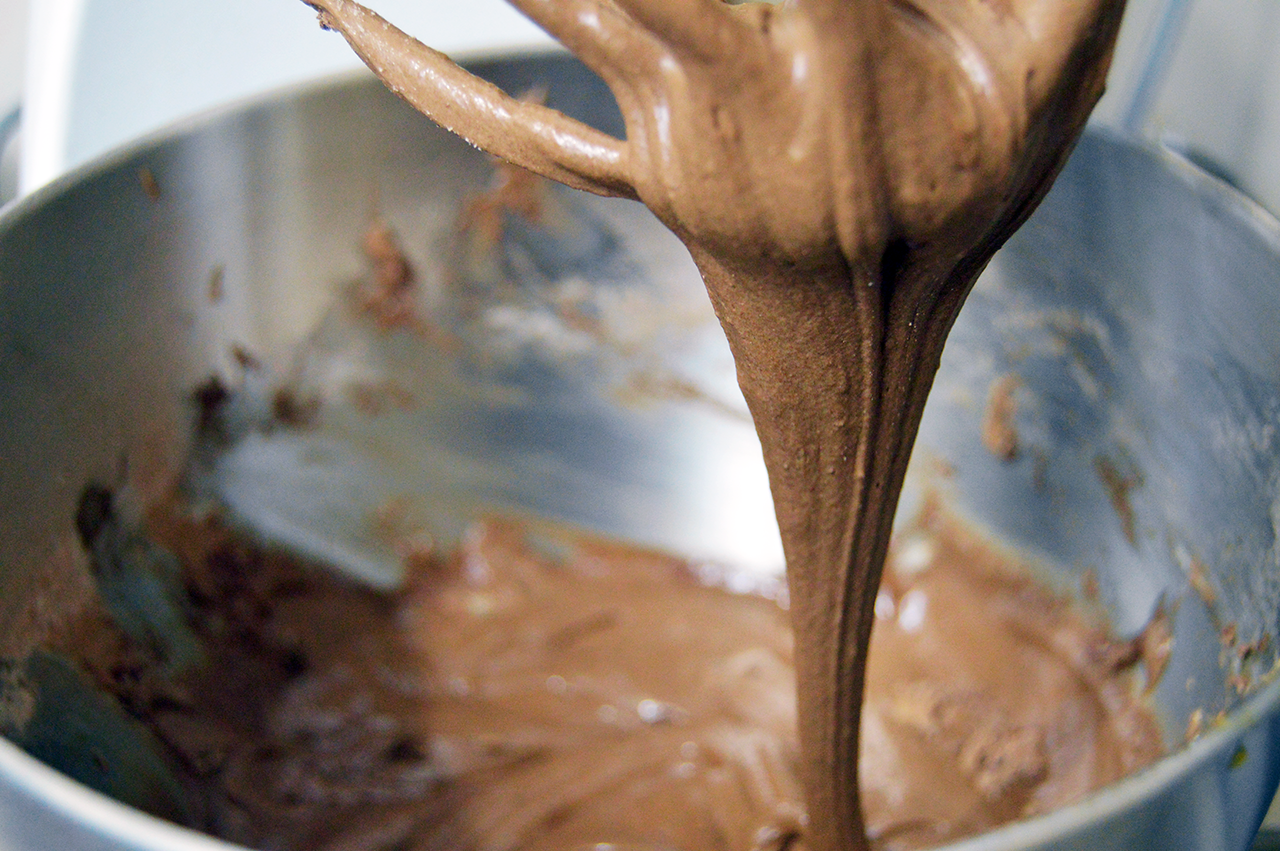
Next, add the egg yolks and butter to the mixture. Gradually add the flour, baking soda, and cocoa in tablespoon increments, stirring until a smooth batter forms.
The Perfect Pan Preparation
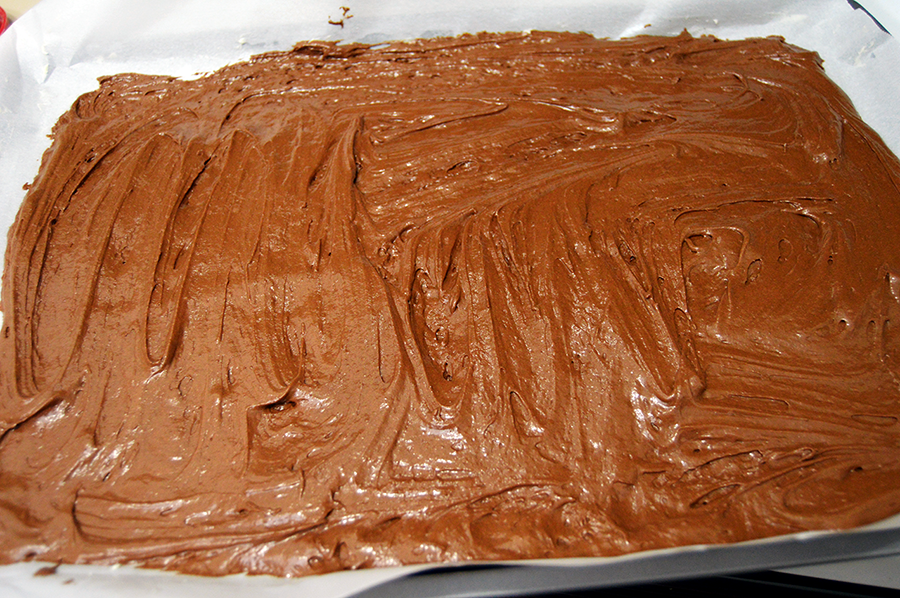
Now it’s time to prepare the pan for baking. Start by generously buttering a jelly roll pan. Place a sheet of parchment paper over the butter and press it down to make it stick. Then, grease the parchment paper with more butter to ensure the cake doesn’t stick.
Baking and Rolling
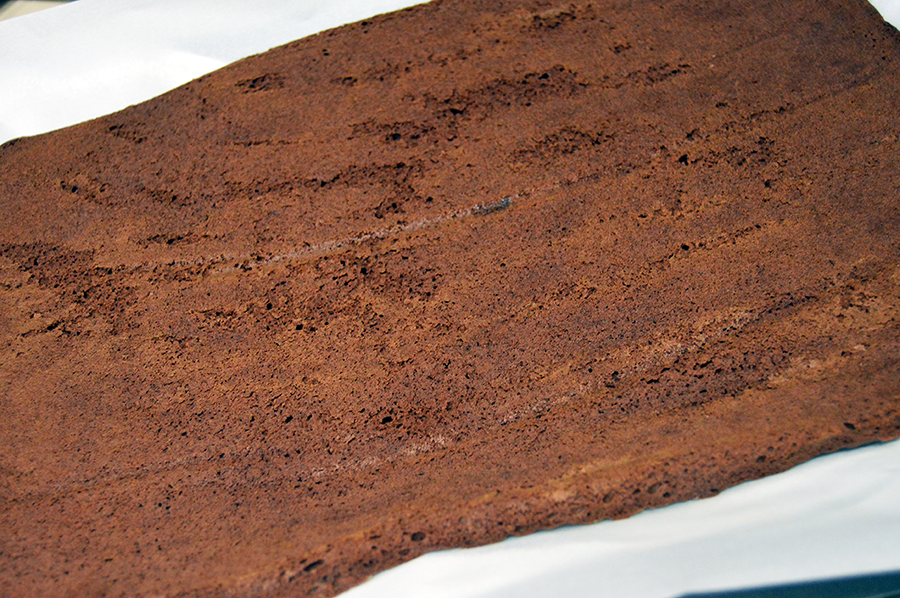
Spread a smooth, 1/4-inch thick layer of the cake batter across the parchment paper, ensuring an even distribution. Bake the cake in a preheated oven at 350°F for about 15 minutes or until it puffs up and appears dry on top. Let it cool for approximately 10 minutes.
Cover the cake with another piece of parchment paper, followed by a towel and a second, larger jelly roll pan. Carefully invert the pans so that the cake lands on the larger parchment and towel-lined pan. Peel off the original parchment paper from the cake.
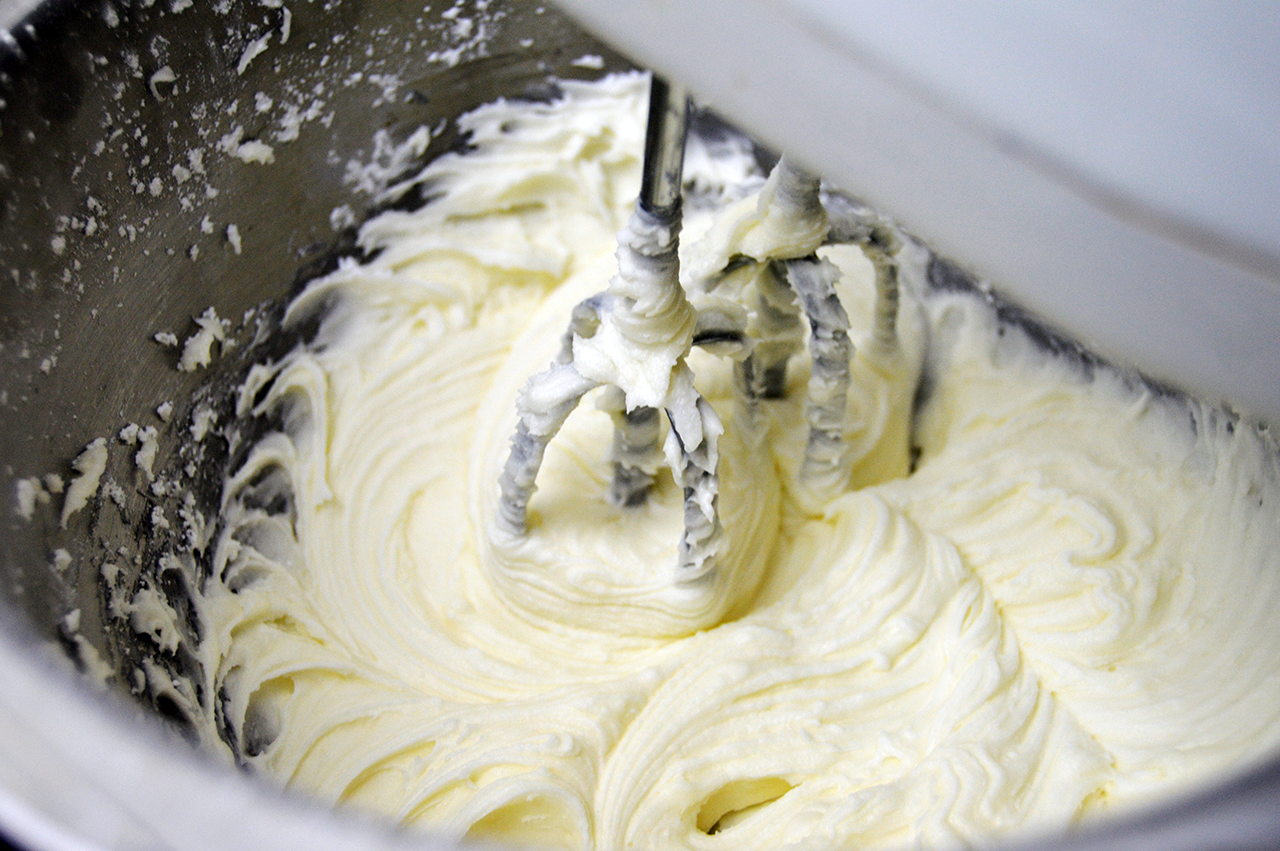
Allow the cake to cool completely while you whip together the powdered sugar, marshmallow fluff, cream of tartar, and water. Mix until a thick and luscious frosting forms.
Filling and Shaping the Cake
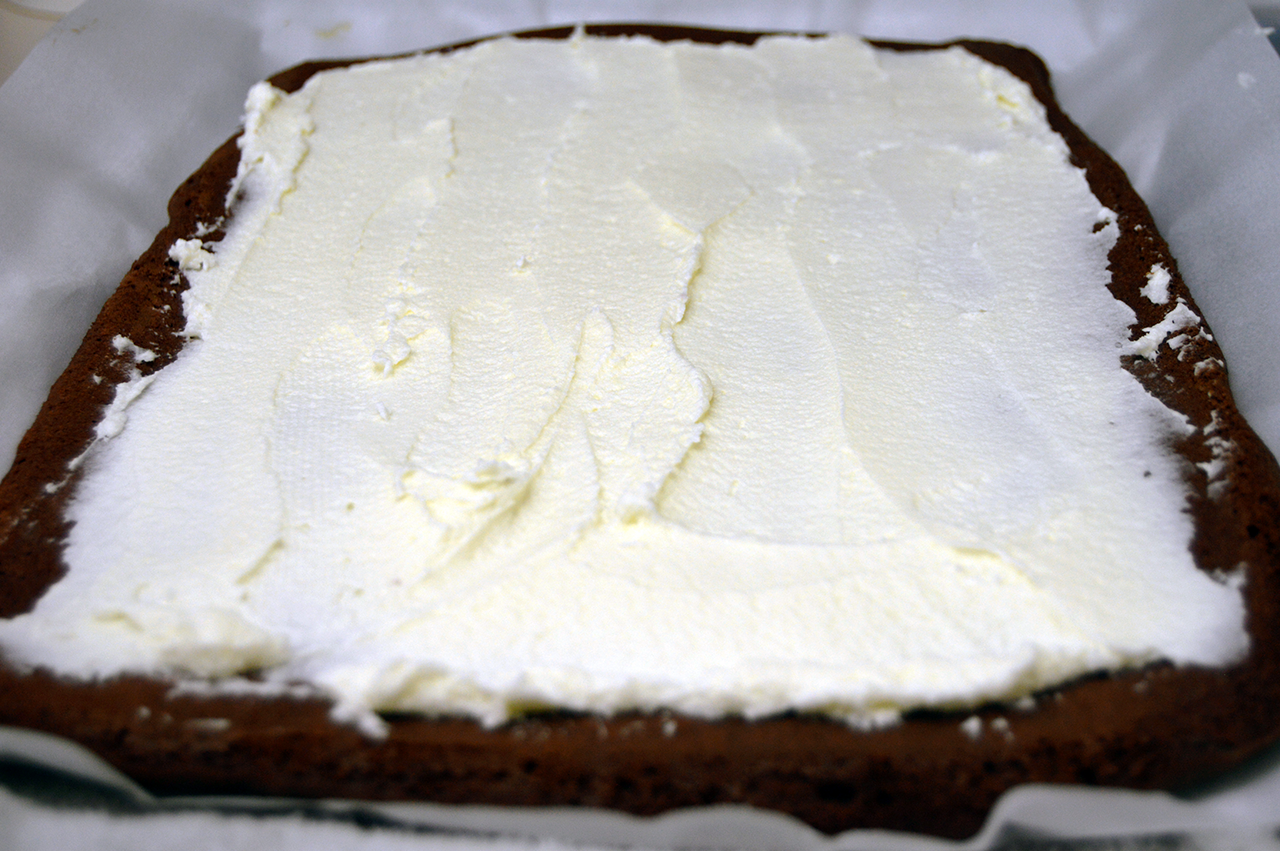
Starting from the center, spread the cream filling to the edges of the cake. Lift up the parchment paper on one of the short ends of the cake and gently roll and tuck the cake into itself, forming a cylinder shape. Wrap it tightly in parchment paper and refrigerate for at least 8 hours or overnight.
Chocolate Coating for the Perfect Finish
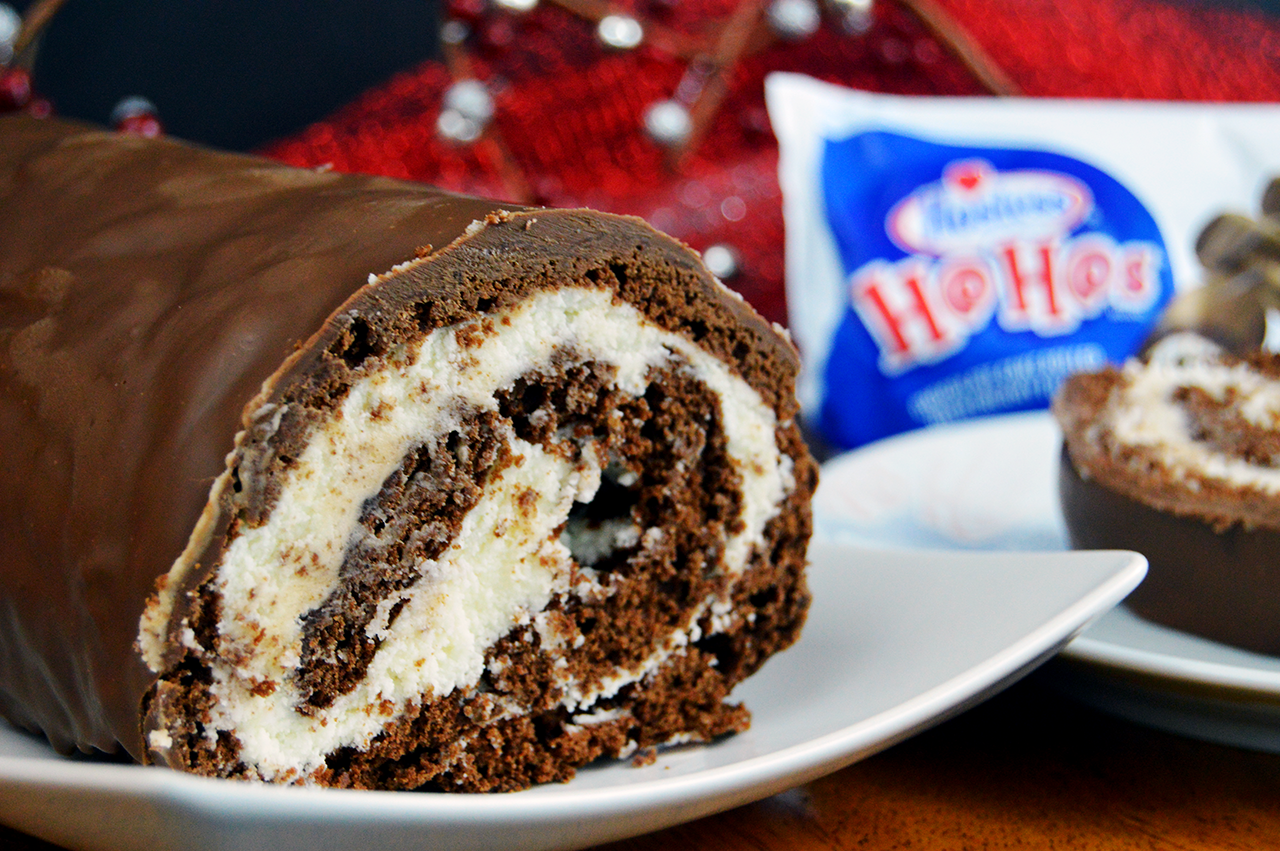
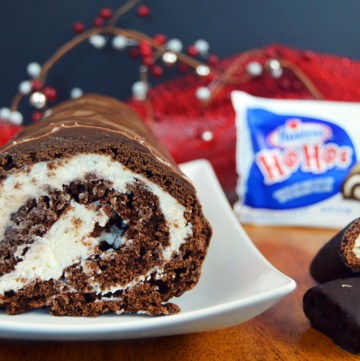
In keeping with the giant theme, I went all out and used extra-large Hershey chocolate bars for the coating.
If you want to match the authentic Ho Ho appearance more closely, consider using a darker chocolate. However, if you’re like me and prefer milk chocolate, it works just as well!
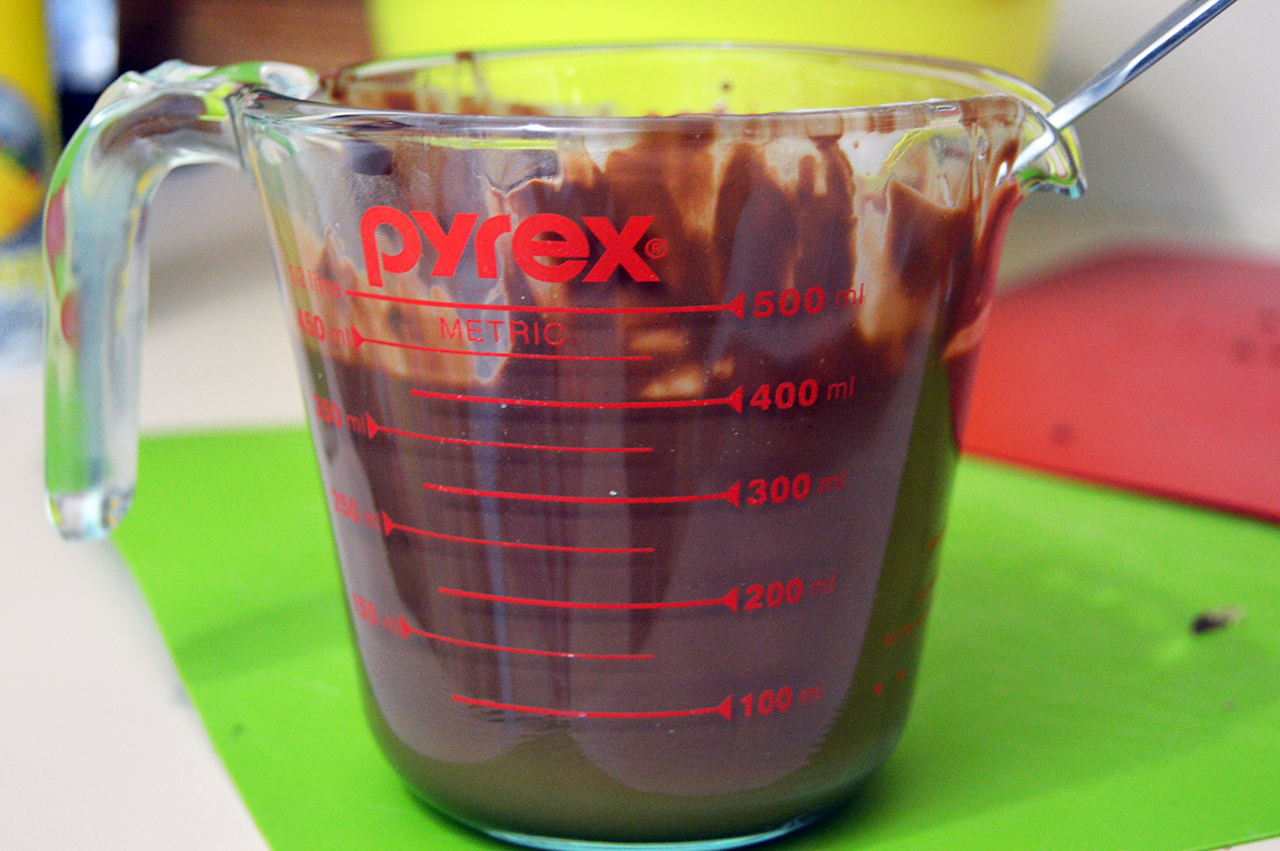
Melt the chocolate along with some shortening in the microwave, heating it in 30-second increments and stirring in between until fully melted.
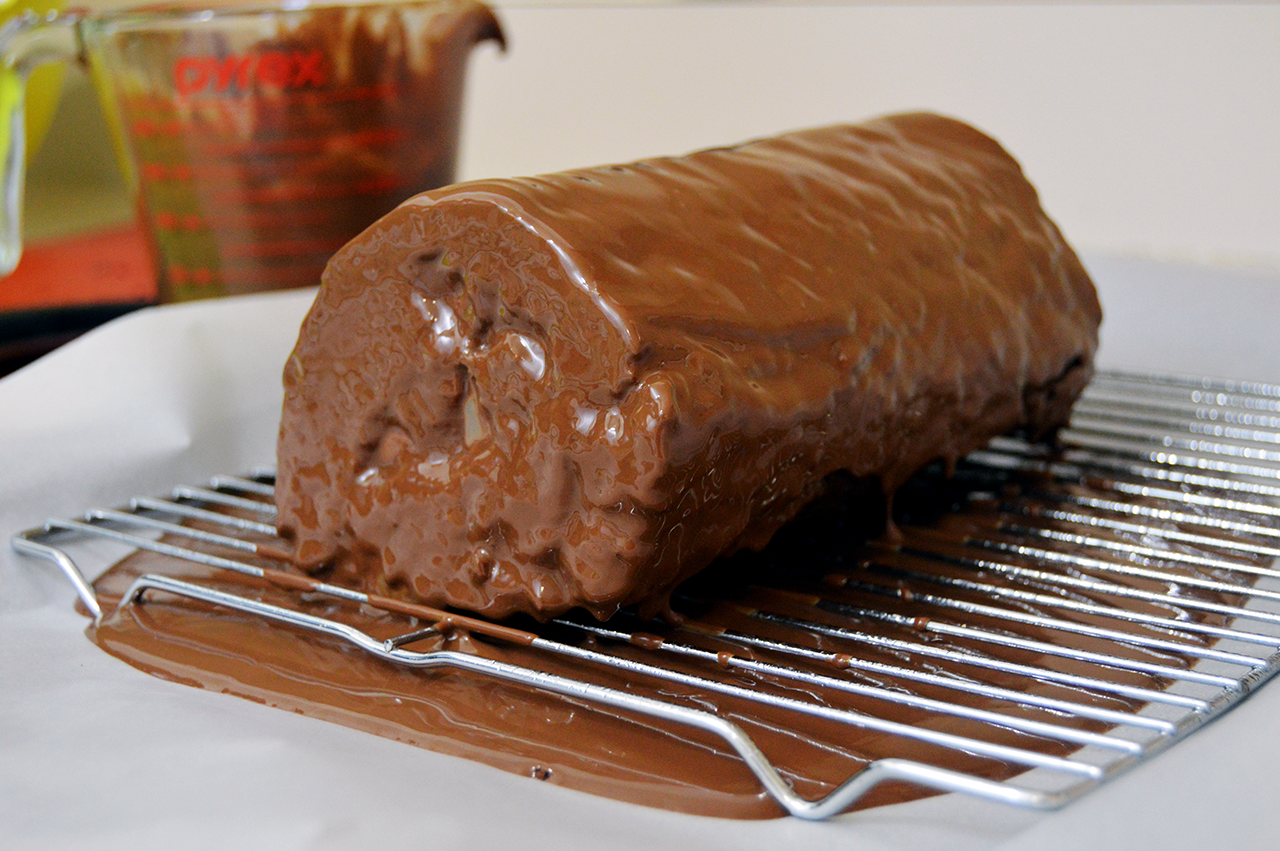
Place a cooling rack on top of a baking sheet lined with parchment paper. Carefully pour all of the melted chocolate over the top of the giant Ho Ho, allowing it to coat the cake.
Lift the cooling rack off the baking sheet and quickly roll the parchment into a tube, guiding the excess chocolate back into the pouring cup.
Repeat this step a few times for an extra thick chocolate covering.
Tips for Making a GIANT Ho Ho Cake
- Separating egg whites and yolks: Be careful to ensure no traces of yolks are mixed with the whites, as it can prevent the whites from achieving stiff peaks.
- Buttering the jelly roll pan and parchment: This double buttering technique helps prevent the cake from sticking, making it easier to roll later on.
- Adjusting the filling consistency: If the filling is too thin, gradually add more powdered sugar until it thickens. If it’s too thick, add a little more water to achieve the desired sticky consistency.
- Chilling the filled cake: Allowing the cake to chill for at least 8 hours or overnight ensures that the filling sets and the flavors meld together.
- Using a cooling rack and parchment paper: Placing the cake on a cooling rack with parchment underneath makes it easier to pour and collect excess chocolate during the coating process.
- Chilling until the chocolate hardens: Make sure the chocolate coating is completely dry and hardened before serving or storing the cake.
General Tips:
- Room temperature ingredients: Bring butter, eggs, and other refrigerated ingredients to room temperature before using them to ensure better incorporation and a smoother batter.
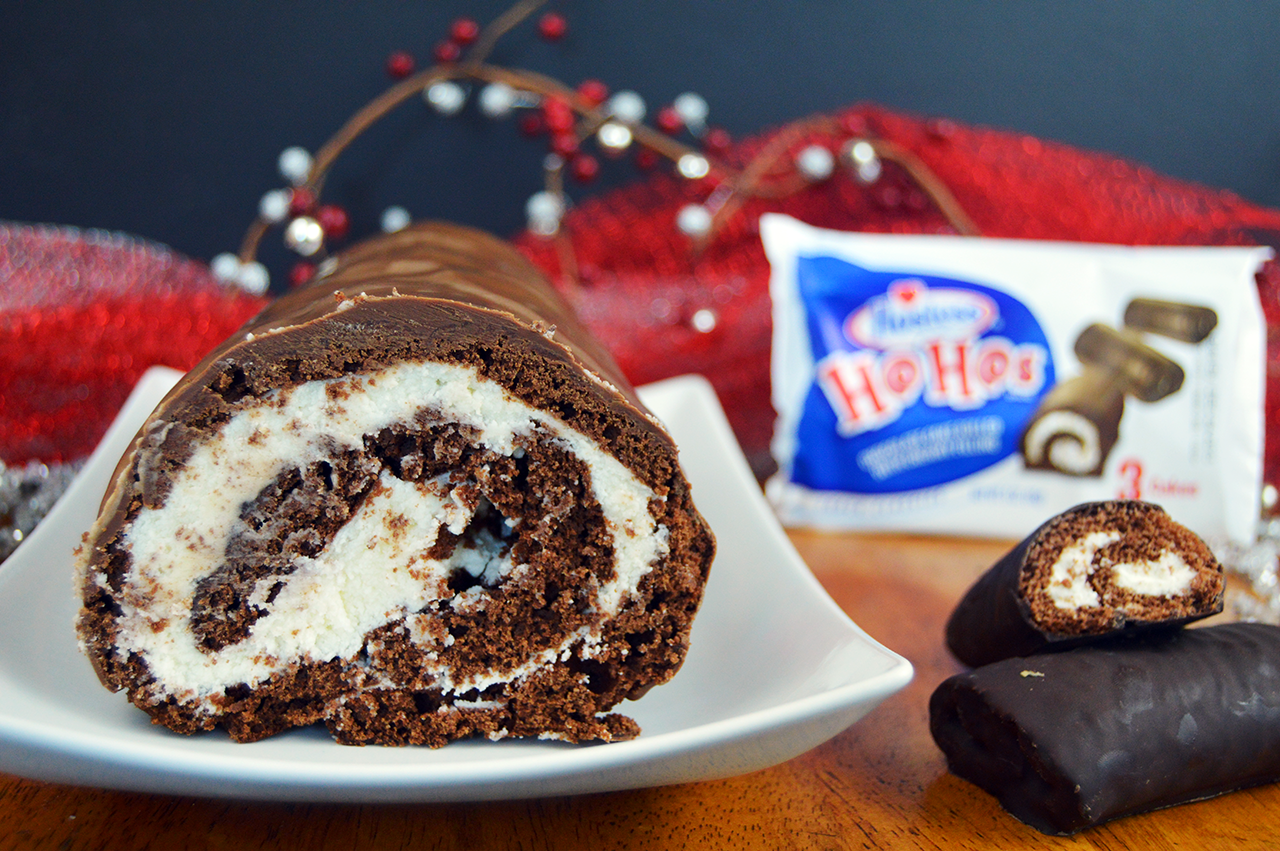
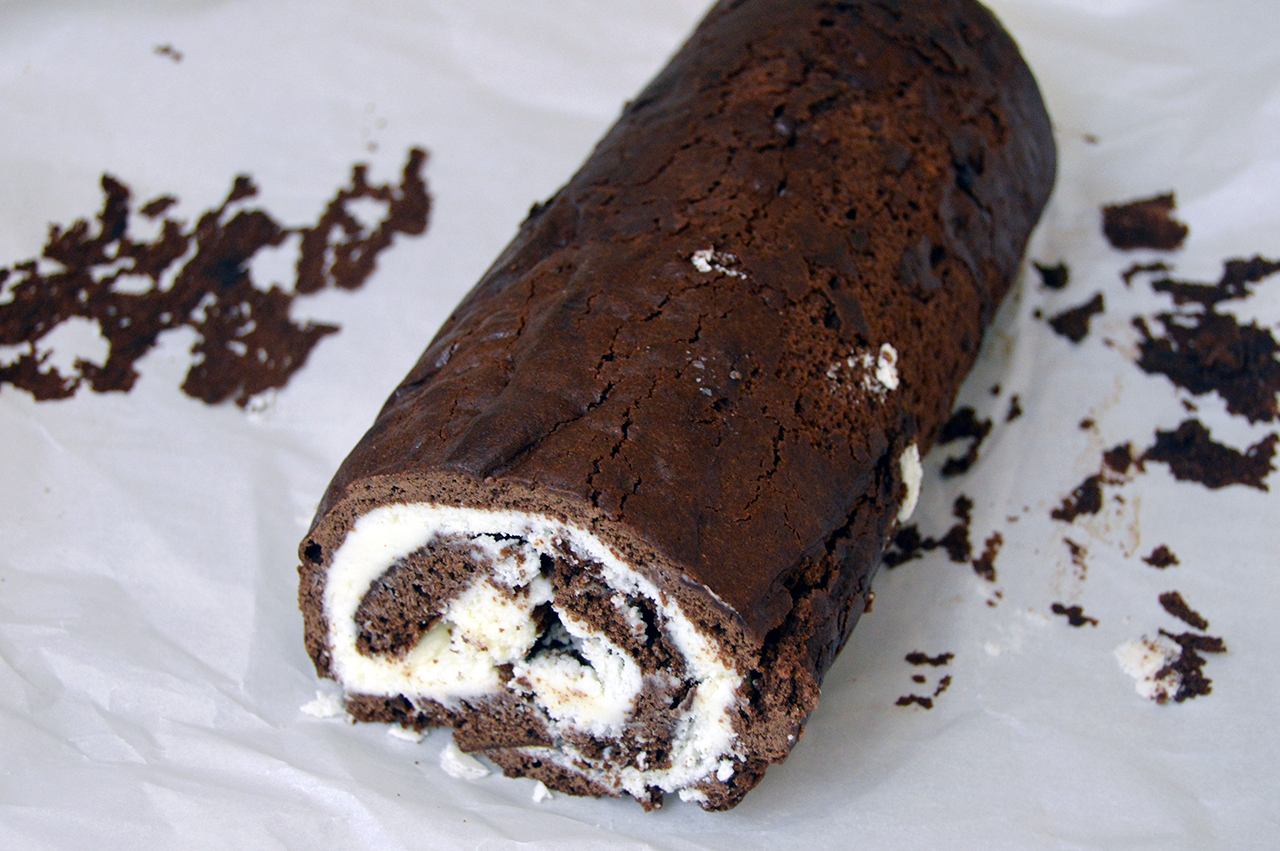
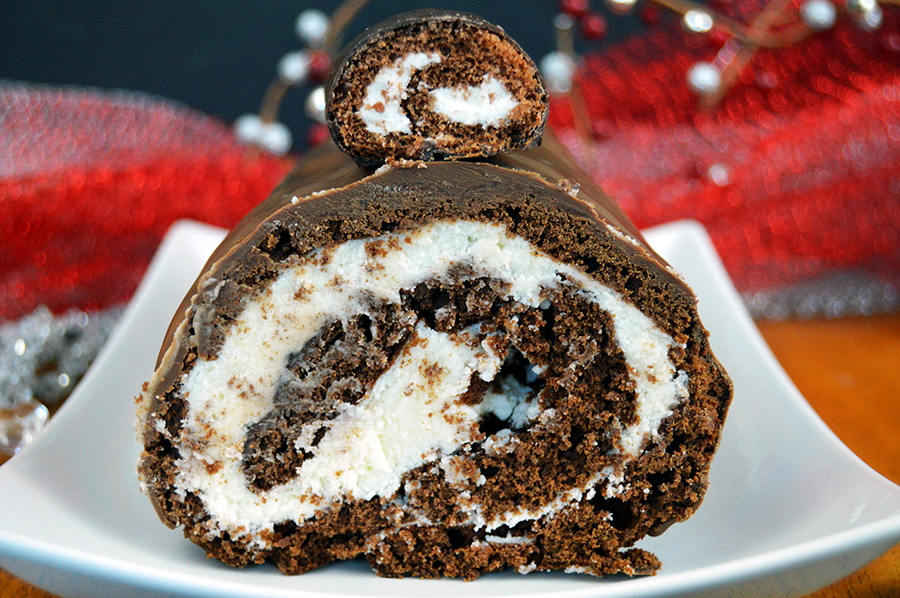
- Trimming the ends of the cake: Trimming the ends reveals the beautiful spiral center, enhancing the presentation of the cake.
- Serrated knife for slicing: When serving the cake, use a serrated knife to cut through it smoothly without squishing the layers.
Troubleshooting:
- Cake sticking to the parchment: Make sure to butter both sides of the parchment paper to prevent the cake from sticking. If needed, gently loosen the edges with a spatula before rolling.
- Filling too runny: If the filling is too runny even after adjusting the consistency, chill it in the refrigerator for a while to firm it up before spreading it on the cake.
- Cracks in the rolled cake: If cracks appear while rolling the cake, gently press the cake together as you continue rolling to help seal the cracks.
Final Touches and Serving
Chill the cake until the chocolate covering is completely dry. To serve, use a serrated knife to cut through the cake, ensuring you don’t accidentally smash it while trying to impress your guests!

A Taste of Success
In a side-by-side taste comparison, I couldn’t have gotten much closer to the original. While the cake part may benefit from a darker Dutch chocolate (as the original Ho Hos likely use), the cream filling is absolutely spot on!
This recipe has undoubtedly earned its place as one of my all-time favorites. I guarantee I’ll be making it again for future parties and events.
Indulge in the irresistible charm of the giant Hostess Ho Hos cake, where homemade goodness, nostalgic flavors, and impressive presentation come together in perfect harmony. With its fluffy chocolate cake, creamy marshmallow filling, and luscious chocolate coating, this cake is guaranteed to be the star of any gathering or event.
So gather your ingredients, unleash your baking skills, and embark on a delightful journey that will leave everyone craving for more. Get ready to create sweet memories and savor every decadent bite of this homemade delight. Enjoy!
Giant Hostess Ho Hos Cake
Ingredients
FOR HO HOS CAKE:
- ¾ cup flour
- ¾ cup brown sugar
- ½ cup unsweetened cocoa powder
- 4 egg whites & yolks separated
- 3 tablespoons sugar
- 1 teaspoon baking powder
- ¼ cup butter + more for greasing
FOR FILLING:
- 2 cups powdered sugar
- 1 cup marshmallow fluff
- 1 teaspoon cream of tartar optional
- 1 teaspoon meringue powder
- ¼ cup water
FOR CHOCOLATE COATING:
- 3 XL Hershey chocolate bars
- 3 tablespoons shortening
Instructions
- Preheat the oven to 350°F. In a stand mixer with a whisk attachment, beat the egg whites on high speed until white and foamy. Slowly add the white sugar, one tablespoon at a time, until stiff peaks form, which should take about five minutes. Add the brown sugar and stir until the sugars are completely incorporated.
- Add the egg yolks and butter to the mixture and beat on high until blended. Then, gradually add the flour, baking powder, and cocoa a few tablespoons at a time, until a smooth batter forms.
- Butter a jelly roll pan and line it with parchment paper. Butter the top of the parchment paper as well. Pour the batter onto the pan and spread it out evenly to create a 1/4-inch thickness.
- Bake for 15 minutes or until the cake is pulling away from the sides and puffed up evenly. Remove from the oven and let it cool for about 10 minutes. While the cake is cooling, prepare another jelly pan by placing a towel over the pan, followed by a piece of parchment on top.
- Place the second pan over the first one (so the parchment on the second pan is on top of the cake, followed by the towel, then the pan) and flip the pans so that the cake falls onto the second pan. Gently remove the first piece of parchment and let the cake cool completely.
- As the cake is cooling, use a hand mixer to whip together the confectioners' sugar, marshmallow fluff, cream of tartar, meringue powder, and water. Add enough water to create a sticky, but not runny, cream filling. Adjust the consistency by adding more powdered sugar if it is too thin or more water if it is too thick.
- Spread the filling across the cooled cake, covering it all the way to the edges. Lift the edge of the parchment paper and gently fold the end of the cake into itself, then continue rolling it into a cylinder shape. Roll the cake tightly in parchment paper and refrigerate for 8+ hours or overnight until it is chilled through.
- When ready to add the chocolate topping, melt the Hershey's chocolate bars with the shortening. Microwave them in 30-second intervals, stirring in between, until the chocolates are completely melted.
- Place parchment paper on a jelly roll pan and place a cooling rack on top. Carefully unwrap the cake and trim the ends. Center the cake on the top of the cooling rack.
- Pour the melted chocolate over the cake. Use the parchment paper lining the pan to funnel any excess chocolate back into the pouring cup, and repeat this process several times to ensure a thick chocolate coating.
- Chill the cake until the chocolate has hardened. Serve the cake cold or at room temperature. Slice and enjoy!