Sous Vide BBQ Chicken Legs
The Starving Chef is supported by Hungry People like you. When you make a purchase through an affiliate link on my site, I may earn a little bit of cash on the side (at no extra cost to you) to help keep my kitchen running. Read our disclosures here.
What’s Up, Hungry People
Step aside, crockpots—there’s a new kid on the block! We’re talking sous vide today.
Though the method has been around for centuries, it’s only recently become a sensation among home chefs, especially those with cool gadgets like immersion circulators and vacuum sealers.
No worries if you’re missing an immersion circulator; there are alternative ways to dive into sous vide, and we’ll chat about that too!
I was stoked to unwrap an Anova immersion circulator (affiliate link) from Nick last Christmas. Seriously, I’ve been daydreaming about this bad boy ever since!
Finally, after picking up some chicken legs on sale, I decided it was time to see what all the fuss was about. A quick heads up: this is my inaugural voyage into the world of sous vide cooking, so I’m just as curious as you are. Got any tips or tricks? Feel free to share in the comments; I’m all ears.
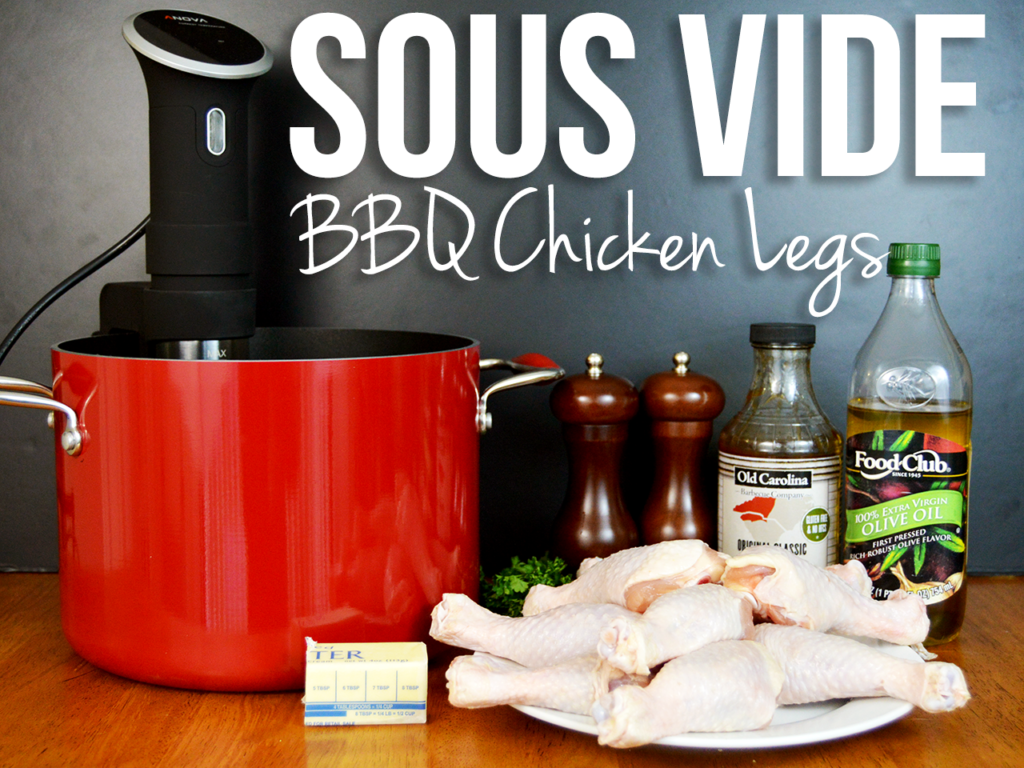
Here’s What You Need
- Chicken legs & flats: The star of the show; provides meaty goodness and texture. Skin-on adds flavor and crispiness.
- BBQ sauce: Adds a sweet, smoky, and tangy layer, enhancing the flavor profile of the chicken.
- Butter: Used in the sous vide process for added moisture and richness; infuses flavor into the chicken.
- Olive oil: Helps to achieve a crispy skin during the quick fry stage; also enhances overall flavor.
- Parsley: Optional, but adds a fresh, herby contrast to the rich and smoky elements.
- Salt & pepper: Basic seasonings to bring out the natural flavors of the chicken; used in the seasoning mix before sous vide cooking.
Let’s Cook!
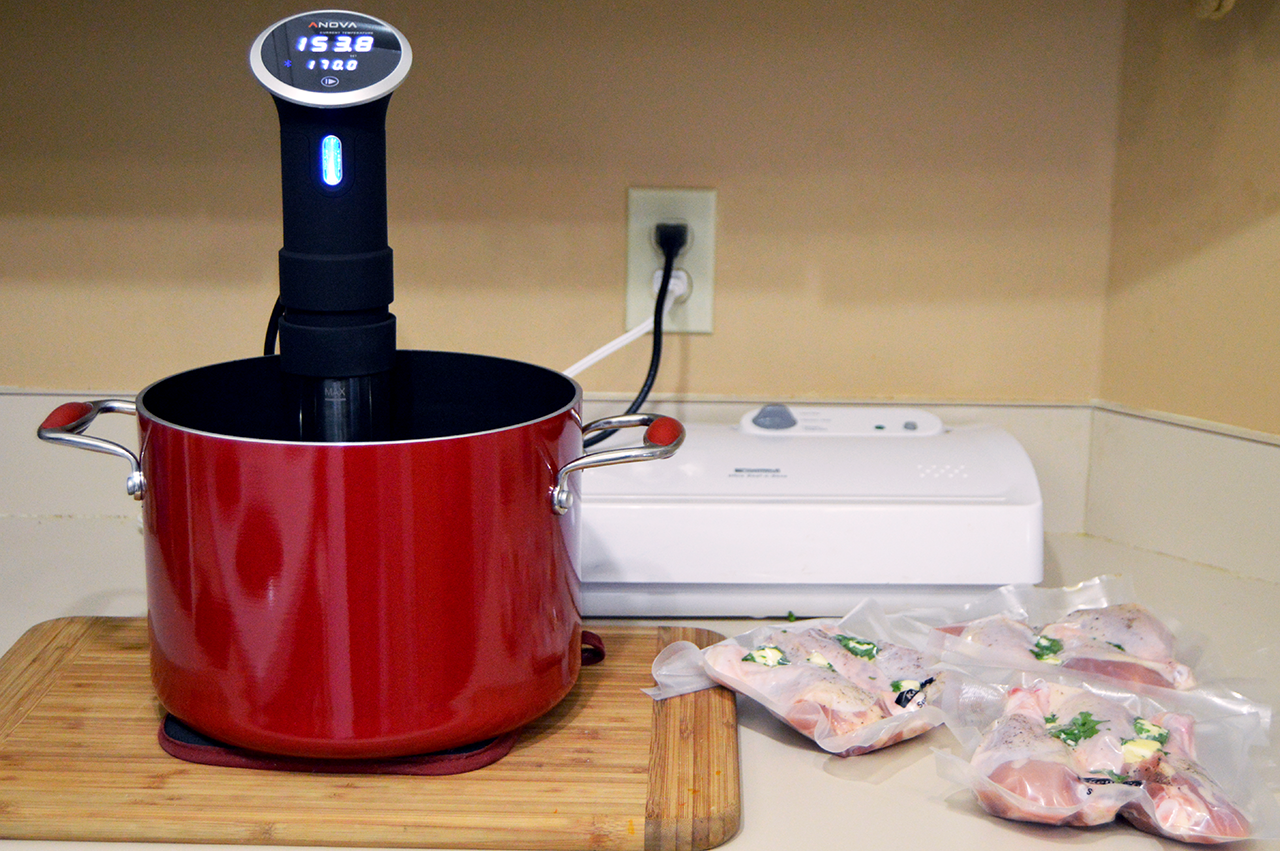
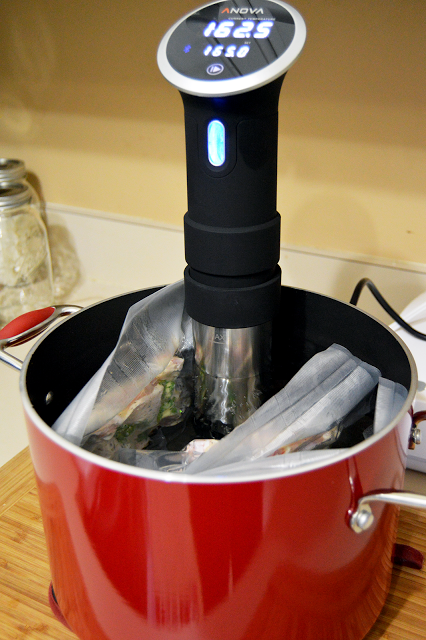
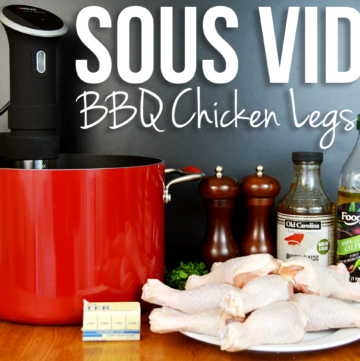
My set-up is pretty straightforward: an immersion circulator set up in a pot full of water (sitting securely on a hot pad atop a chopping block, because safety first, folks) and a food vacuum sealer—another generous gift from my folks—complete with sealer bags.
One of the killer perks of sous vide cooking is that you can cook your meat in a vacuum-sealed bag, usually with minimal seasoning—just a pinch of salt and pepper. The magic happens as the meat releases its natural juices, keeping itself moist and tender without much help.
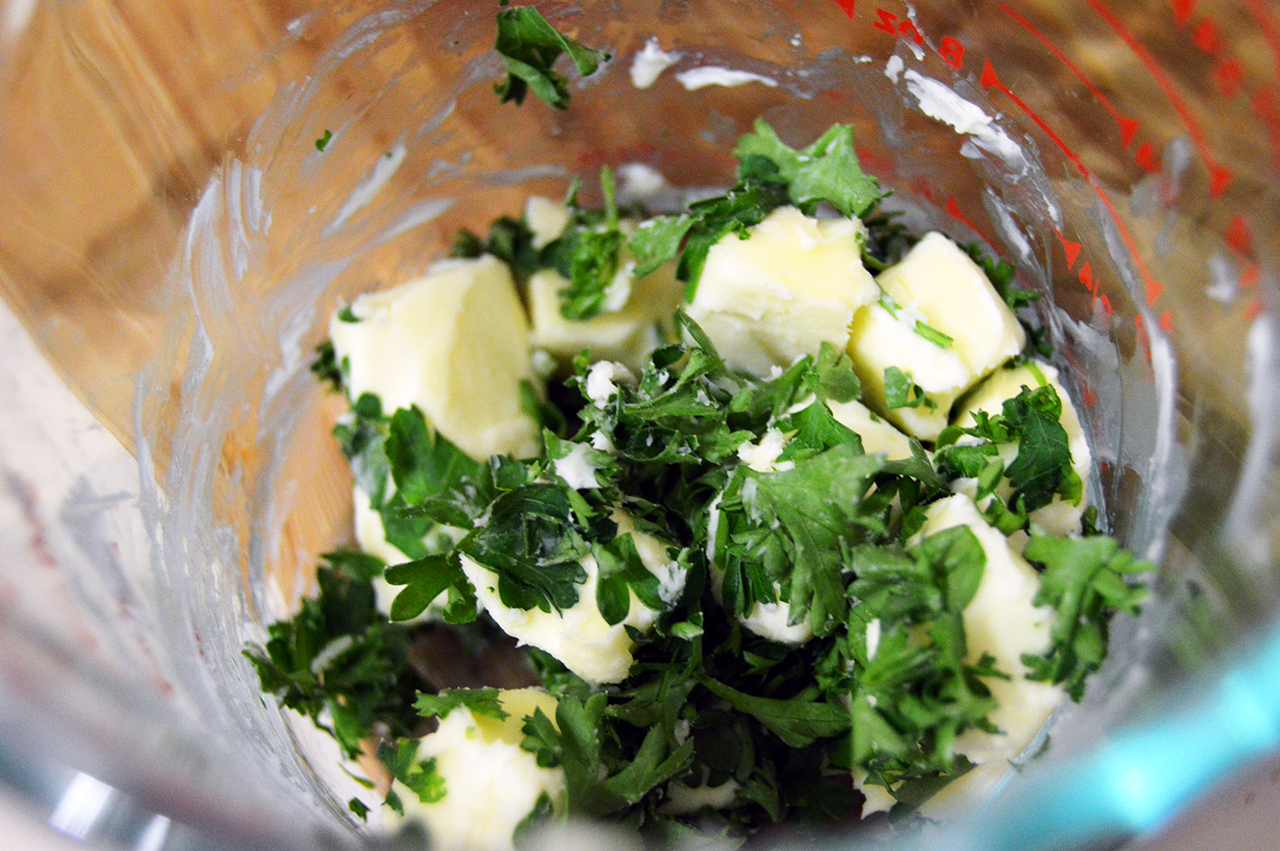
However, being the maverick that I am, I threw in a couple tablespoons of butter and a handful of fresh parsley into the bags for, you know, research purposes.
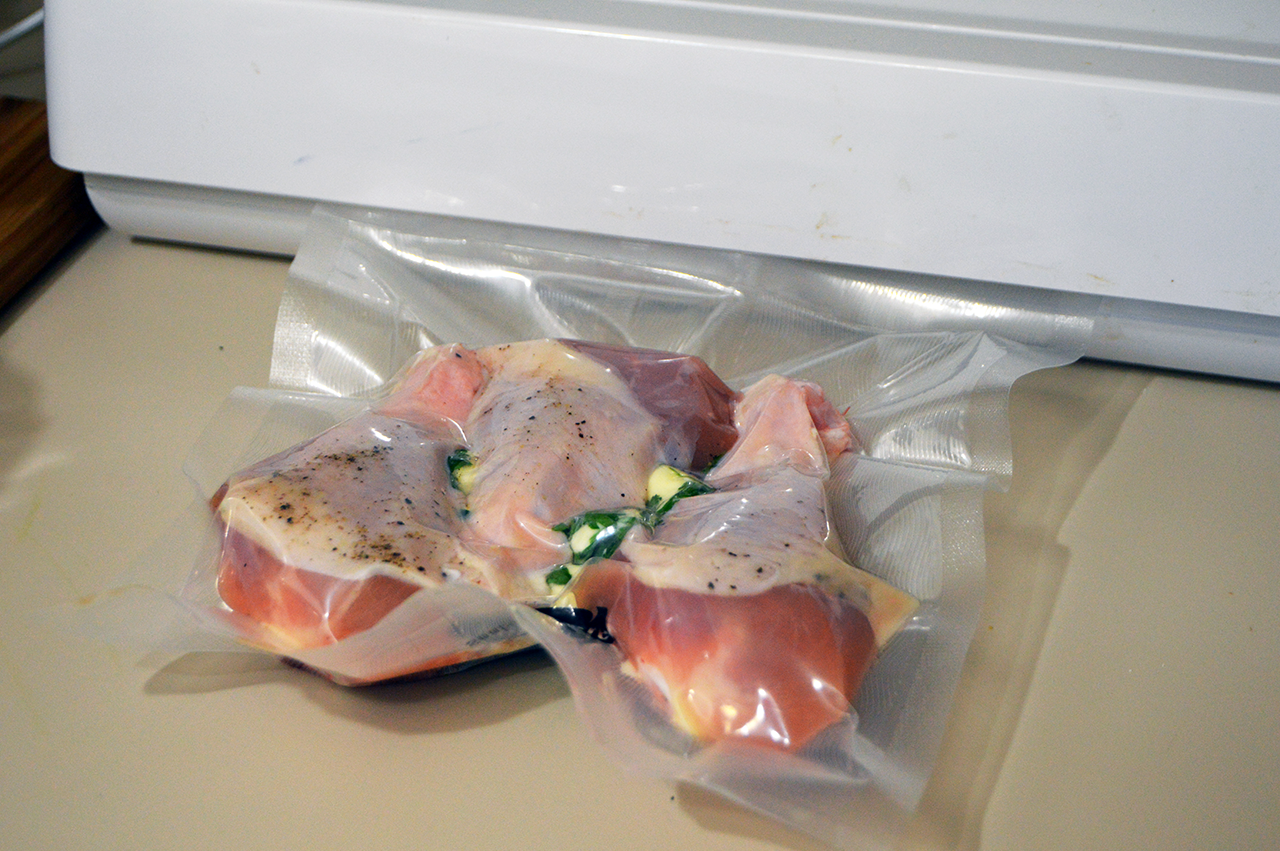
I portioned out three drumsticks in each bag and seasoned them liberally with salt and pepper. Once my immersion circulator reached 165°F (which I could control from the comfort of my living room couch, thanks to the Anova Culinary app), in went the vacuum-sealed chicken.
No immersion circulator or vacuum sealer? No problem!
There are a few alternative methods you can try out to get a similar juicy, tender result.
- Slow Cooker: While it won’t be exactly the same, a slow cooker can also help you achieve tender chicken. Simply add your seasoned chicken legs along with a bit of broth or marinade and cook on low for 4-6 hours. For that crispy skin, give them a quick fry or broil before serving.
- Oven Bag Method: If vacuum sealing is out of the question, you can also use oven-safe bags. Just season your chicken, add some marinade or butter, and seal it up. Pop them in a water-filled, oven-safe pot in the oven at a low temperature (around 200°F or 93°C). It’s not precise like sous vide, but it’s a similar concept.
- Ziplock and Water Displacement: Fill a large pot with water and heat it on the stove to your desired temperature. Season the chicken and place it in a Ziplock bag. Submerge the open bag in water to push out the air, then seal it. Place the bag in the pot, ensuring it stays submerged.
- Beer Cooler Hack: If you’ve got a quality beer cooler around, you can actually use it for a makeshift sous vide. Heat water to a little above your target temperature and fill the cooler. Drop in your Ziplock-bagged chicken and close the lid tightly. The cooler will maintain the temperature for a surprisingly long time.
Cooking Time and Temperature
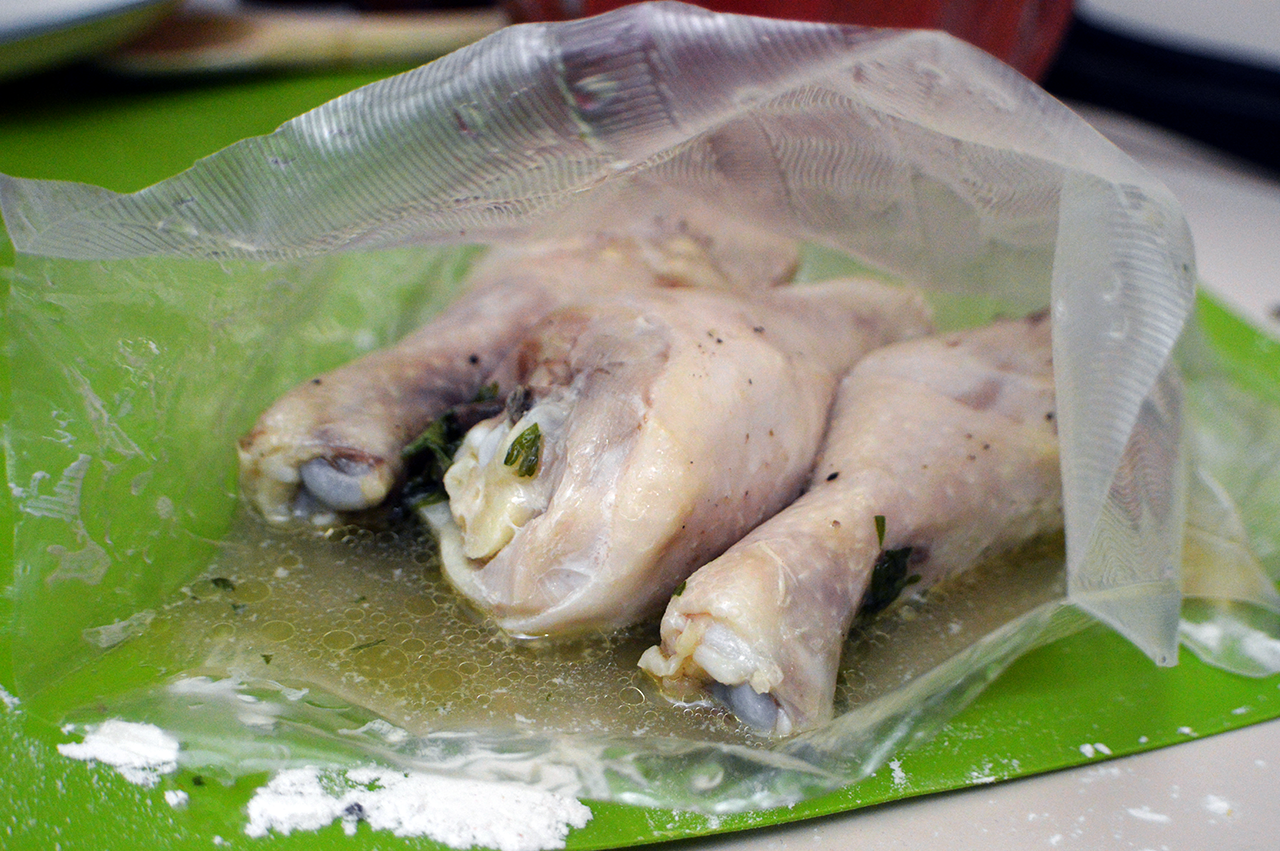
The chicken legs took a three-and-a-half-hour dip in the sous vide pool, although they were probably good to go in about an hour. Fun fact: because the water stays at a consistent 165°F, there’s practically no risk of overcooking the chicken. It’ll only get more tender as it bathes in that warm water.
Could I have left them in longer? Probably. But let’s be real, patience isn’t my strongest suit when I’m hungry!
Crisping That Skin
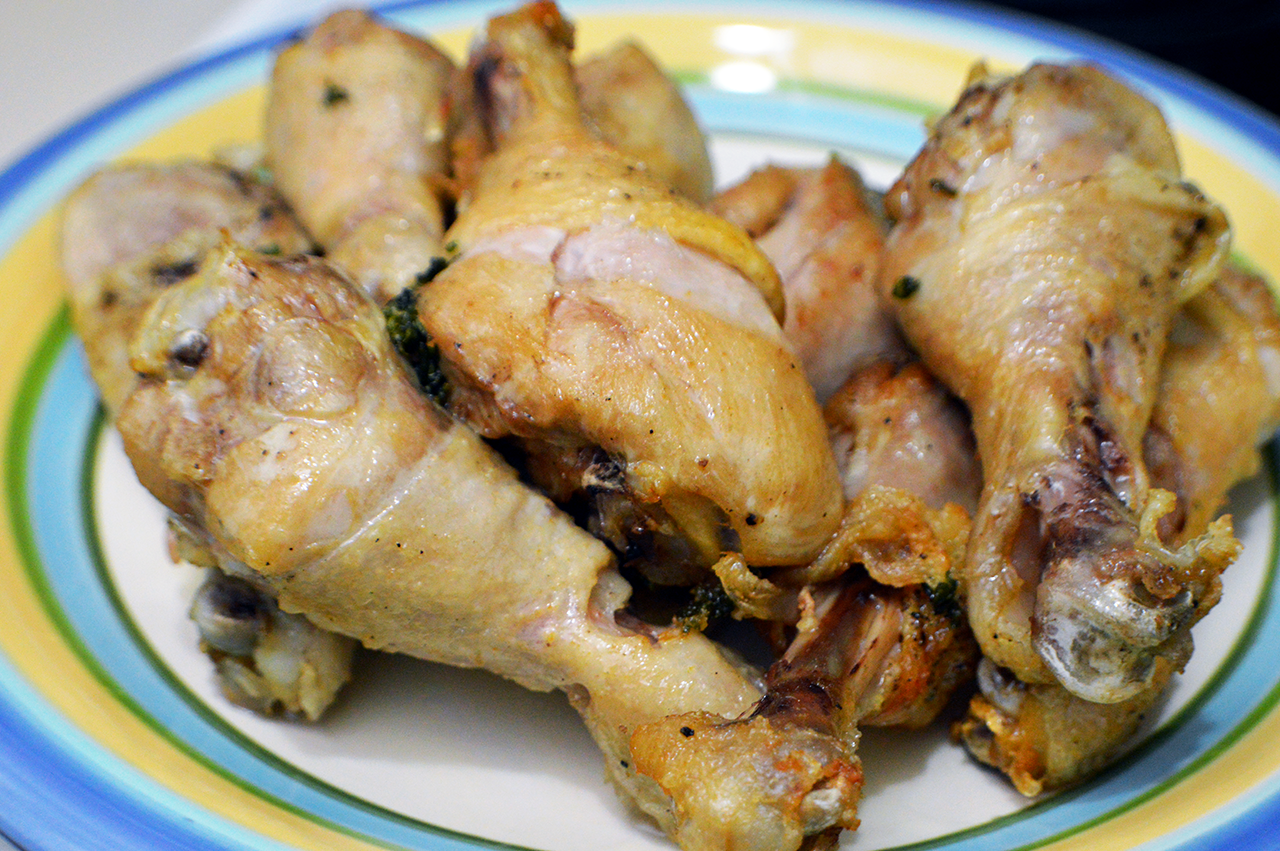
I did some reading on achieving that coveted crispy skin after sous vide cooking. Flash frying for about a minute was my method of choice, and let me tell you, it nailed it.
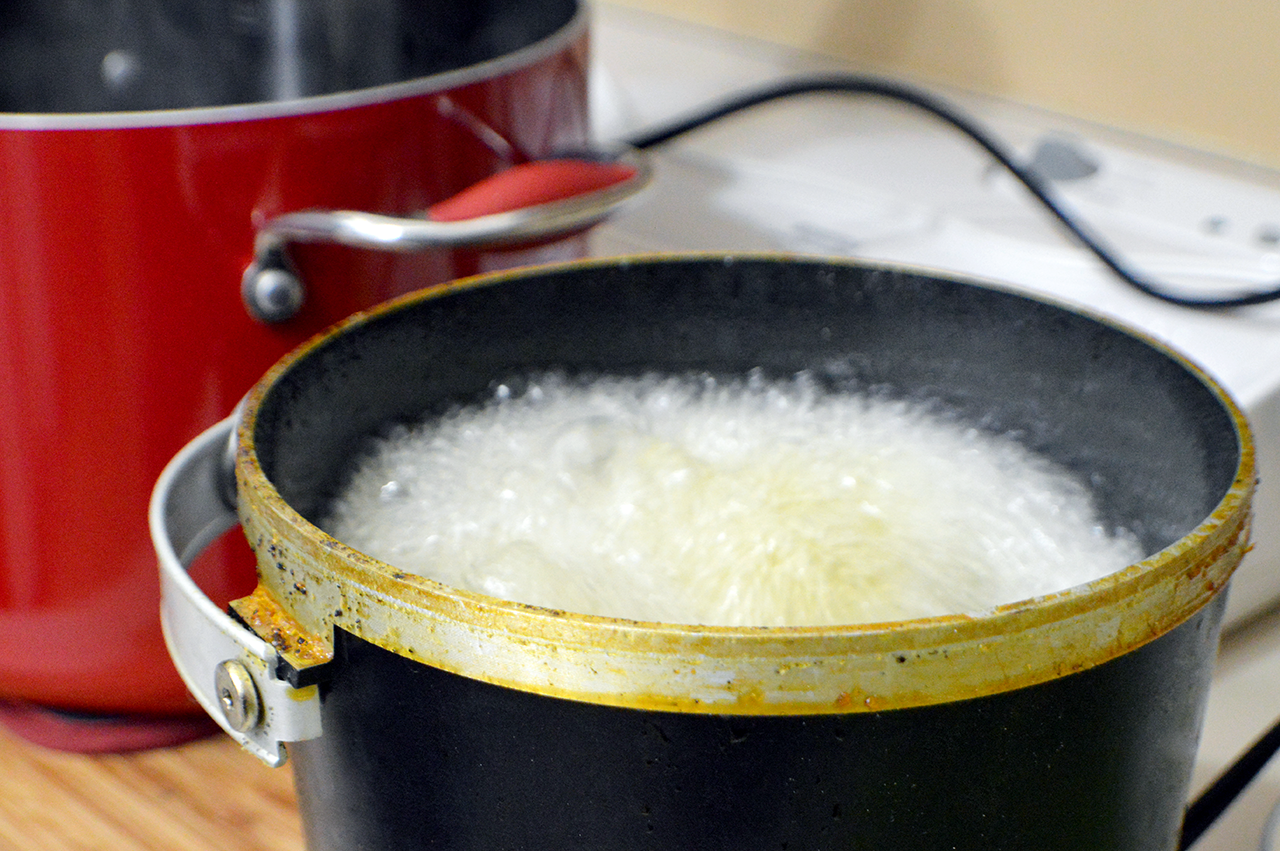
I tried pan-frying first, but the skin had a bad habit of sticking to the pan and tearing off the incredibly tender meat. Note to self: flash frying is the way to go.
Tips for Sous Vide
- Immersion Circulator Placement: Make sure your immersion circulator is securely attached to your pot to ensure even water circulation. Poor circulation could result in unevenly cooked chicken.
- Bag Placement: To allow for proper water circulation around each piece, don’t overcrowd the vacuum bags with chicken legs. Maybe do a bag test before starting the actual cooking process.
- Water Level: Keep an eye on your water level during cooking, especially for longer cooking times. If it drops, add more water to maintain coverage of the bags.
- Temperature Fluctuations: If your water temperature drops or spikes, don’t panic! Just allow it to come back to the set temperature and consider extending the cooking time a bit for consistency.
- Checking Doneness: If you’re unsure if the chicken is done, you can always take out one piece, cut into it, and check. Sous vide is forgiving in that you can simply reseal and continue cooking if needed.
- Crisping the Skin: If frying isn’t your style, you can also use a broiler to crisp up the skin after sous vide cooking. Just keep an eye on it to prevent burning!
- Sauce Application: If your sauce isn’t sticking well, you can toss the chicken legs in a bowl with the sauce and then lay them out to rest. This ensures even sauce coverage.
- Resting Time: Don’t skip the 10-minute rest after saucing. It helps the sauce to thicken up and adhere to the chicken, enhancing flavor.
- Alternative Herbs: Not a fan of parsley? Thyme or rosemary can be good substitutes, each offering a distinct flavor profile.
- Leftovers: If you happen to have any leftovers, they reheat wonderfully the next day. Just avoid microwaving, as it can make the meat dry and the skin soggy.
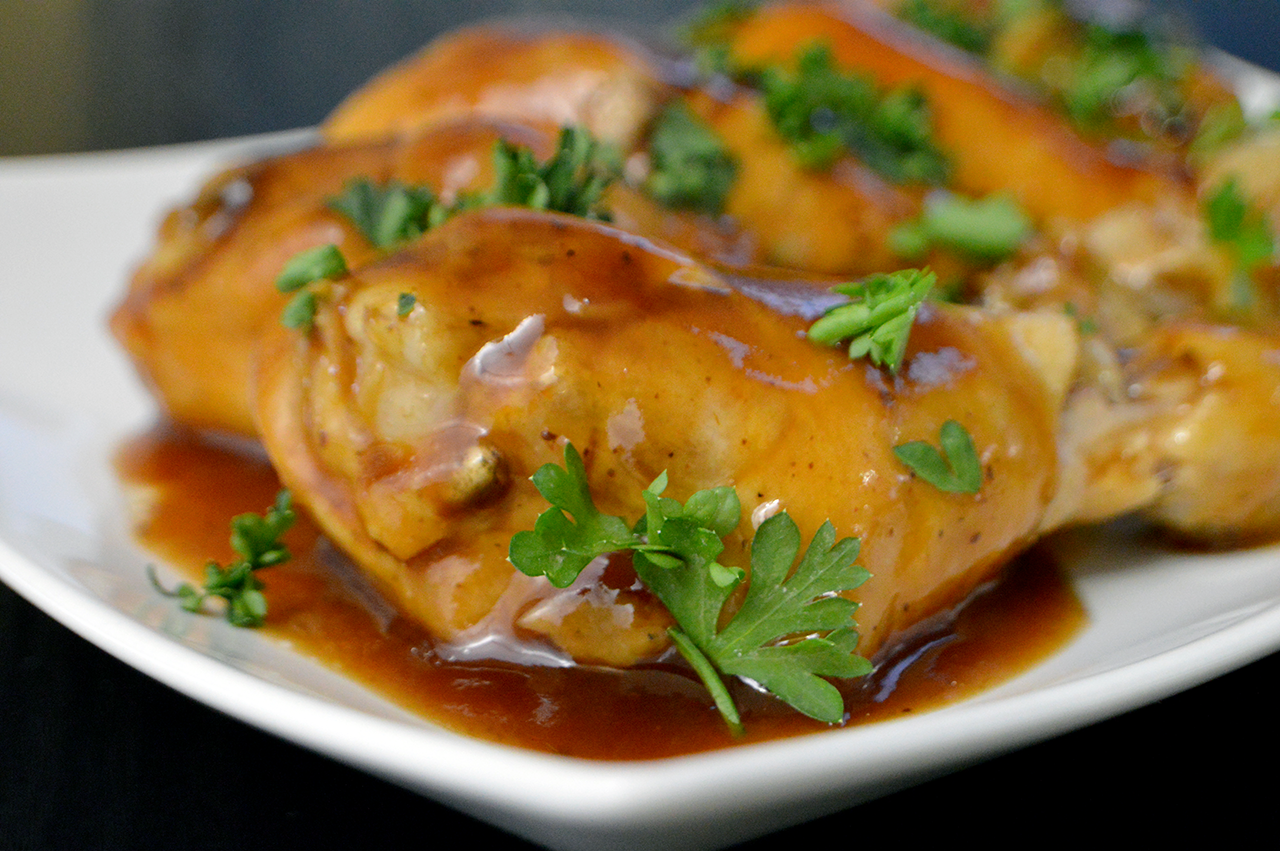
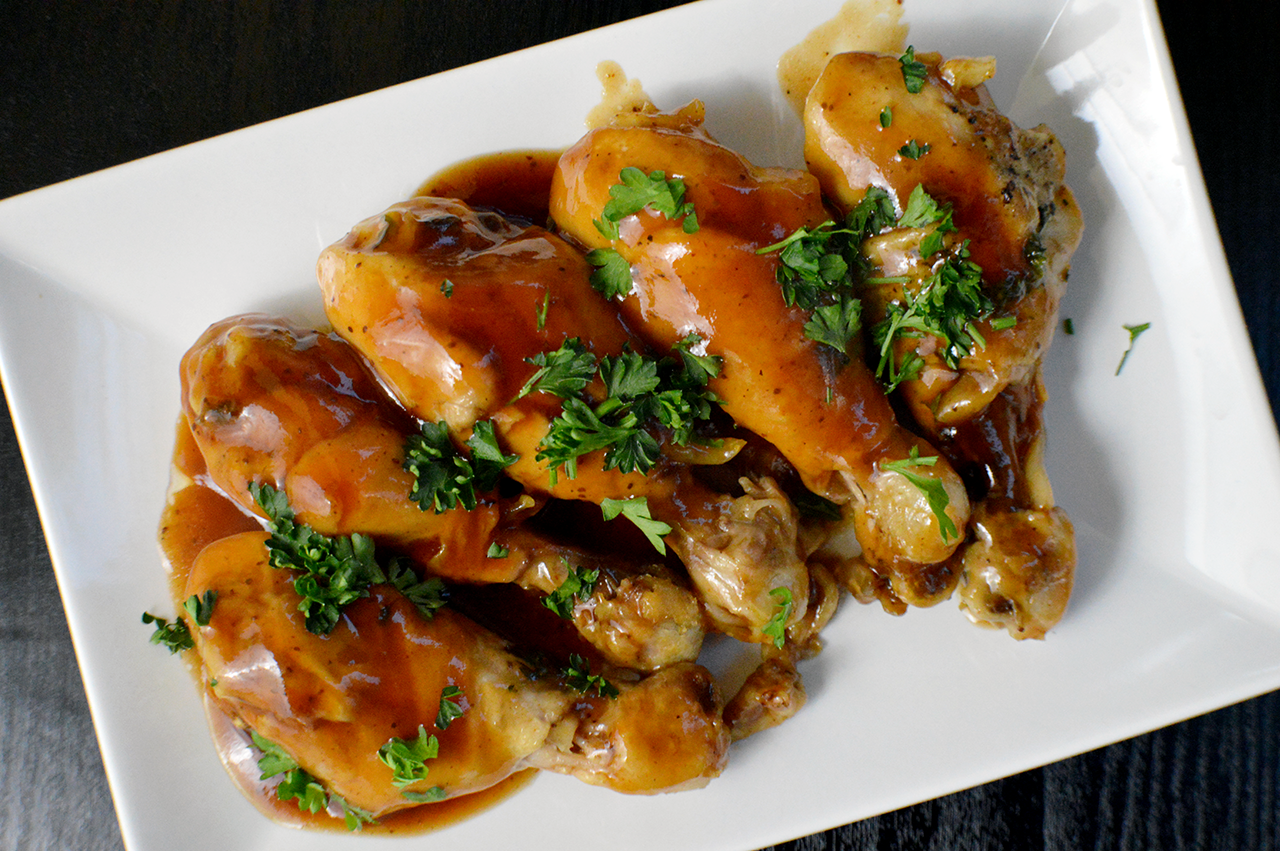
Sauce It Up
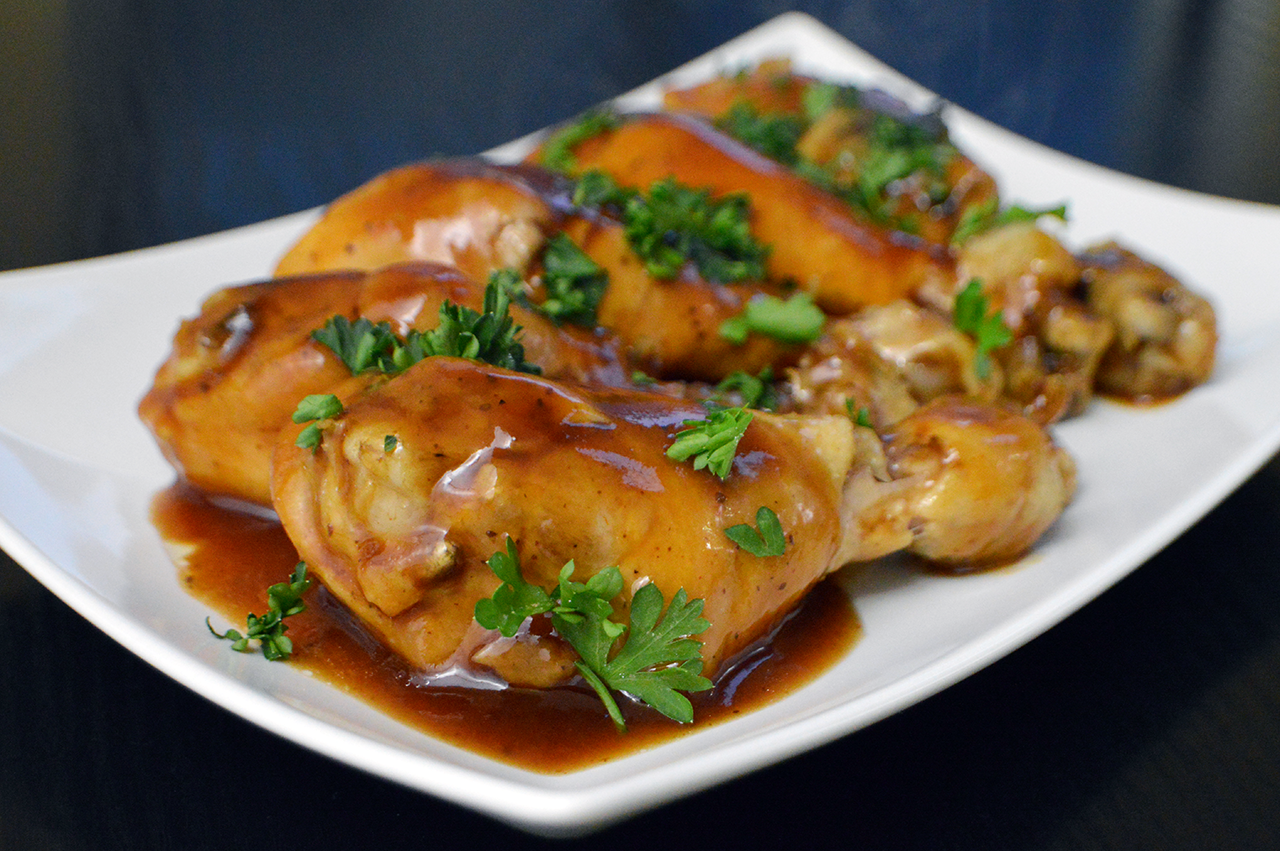
I wrapped things up by smothering the chicken legs in a generous pour of our go-to barbecue sauce. Let them rest for a solid ten minutes to let that sauce work its magic and thicken up.
These chicken legs turned out spectacular—no joke. The meat practically fell off the bone and was tender enough to melt in your mouth. The immersion circulator is quickly making its way to the top of my kitchen gadget hierarchy, even potentially dethroning my trusty crockpot. Or dare I say it—my oven? I can’t wait to hear what you Hungry People would like to see for my next sous vide dish!
Alright, Hungry People, what did we learn today? Sous vide isn’t just a fancy French term; it’s a game-changer for making chicken legs that are both juicy and full of flavor. With a quick flash fry at the end, you get that crispy skin we all crave, making each bite a little piece of heaven. Trust me, once you go the sous vide route, there’s no turning back.
Now, go on and give this recipe a try. Can’t wait to hear how it turns out for you. Enjoy!
Sous Vide BBQ Chicken Legs
Ingredients
- 6-8 chicken legs & flats skin on
- 2 cups favorite BBQ sauce
- 4 tablespoons butter cut into cubes
- 2 tablespoons olive oil for frying skin
- 2 tablespoons parsley optional for topping
- salt & pepper to taste
Instructions
- Fill a large pot with water and submerge the immersion circulator. Set the temperature to 165°F (74°C).
- In a small bowl, stir together the cubes of butter and parsley. Season the chicken legs with salt and pepper.
- Place the butter and legs into vacuum bags (about one tablespoon of butter per three legs per bag). Vacuum seal the bags and place them into the large pot when the water reaches the cooking temperature.
- Monitor the temperature to ensure it stays at 165°F (74°C). Sous vide the chicken legs for a minimum of one to four hours, as desired. My legs were finished at three and a half hours.
- Before removing the chicken legs from the water bath, preheat a deep fryer (or stovetop skillet with an inch of olive oil) to 375°F (190°C). Remove the chicken legs from the bags and let the excess moisture drip off. Dunk the chicken legs into the fryer for one minute, until the skin is brown and crispy.
- Pour your favorite barbecue sauce over the legs and let them rest for 10 minutes. Serve hot and enjoy!