Quick and Authentic Irish Soda Bread for St. Patty’s Day
The Starving Chef is supported by Hungry People like you. When you make a purchase through an affiliate link on my site, I may earn a little bit of cash on the side (at no extra cost to you) to help keep my kitchen running. Read our disclosures here.
What’s Up, Hungry People?
This Saint Patrick’s Day, why not celebrate with some good old-fashioned Irish soda bread? It requires very little kneading and takes less than an hour to make. Trust me, that’s just the perfect amount of time to get “bladdered” (that’s Irish slang for “drunk”).
The Many Faces of Soda Bread
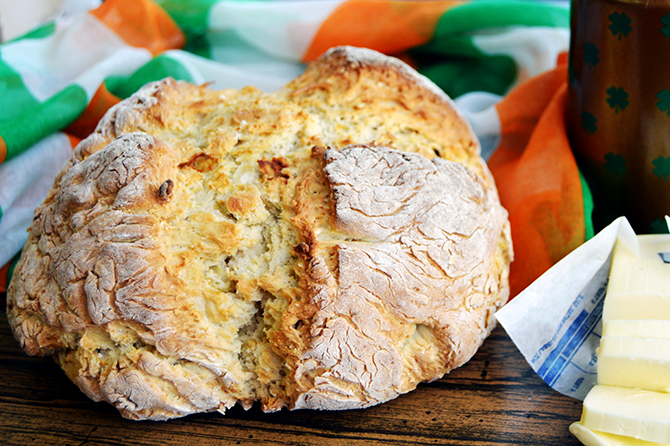
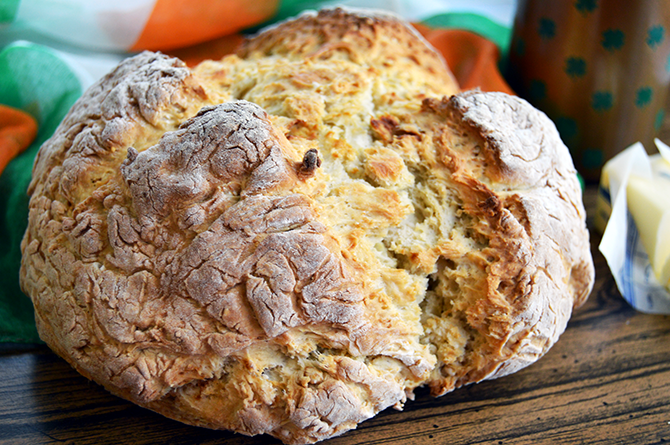
Irish soda bread rocks a nice, thick crust and offers a plethora of preparation options. Want to mix in cranberries, caraway seeds, or even garlic? Go ahead! Whether you enjoy it plain or jazzed up with seasonings, it’s always best when eaten warm or toasted.
Why It Works
Here’s the deal: the key to an authentic soda bread lies in the magical combo of buttermilk and baking soda. These two ingredients work together to give you that distinctive crust and flavor we all crave.
Here’s What You Need
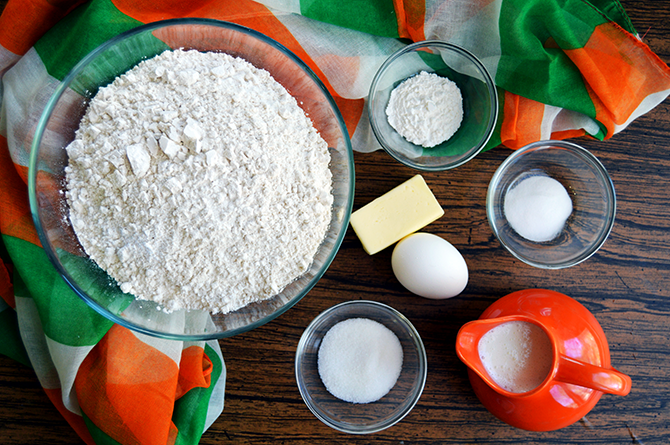
- Flour: Provides the basic structure and body of the bread. It’s the main ingredient that everything else interacts with.
- Buttermilk: Adds tanginess and acidity, helping to activate the baking soda for leavening. It also contributes to moisture.
- Egg: Serves as a binder and adds moisture, making the bread more cohesive and slightly richer.
- Melted Butter: Gives the bread flavor and tenderizes the dough, resulting in a softer crumb.
- Sugar: Adds a hint of sweetness, balances the tanginess of the buttermilk, and helps in browning the crust.
- Baking Soda: Works with buttermilk for leavening, helping the bread rise and become fluffy.
- Baking Powder: An additional leavening agent that ensures the bread rises adequately, making it lighter.
- Salt: Enhances flavor and tightens the dough structure, making for a better crumb.
Let’s Cook
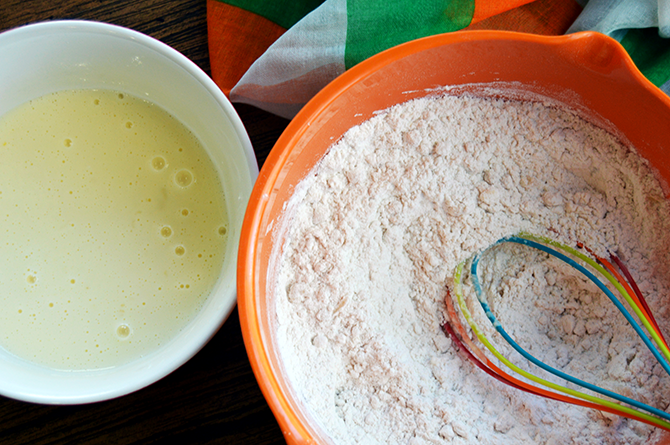
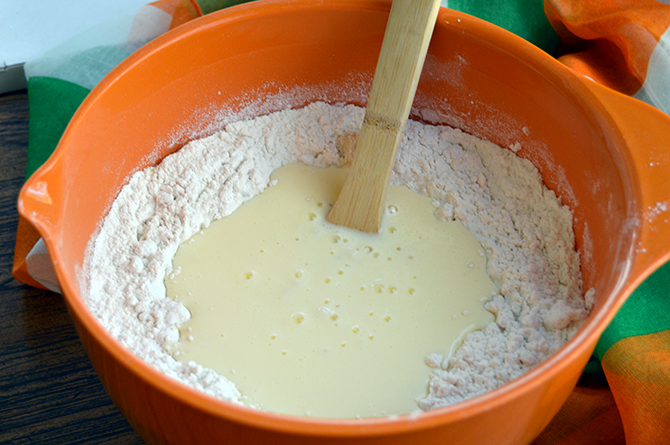
Making soda bread consists of only a few steps, starting by mixing the dry ingredients in one bowl and the wet ones in another. Create a well in the center of the dry ingredients, pour in the wet mixture, and stir until a sticky dough forms.
Get Handsy
Once the dough is no longer stir-able, don’t be shy—really get in there with your hands to make sure everything is mixed together properly.
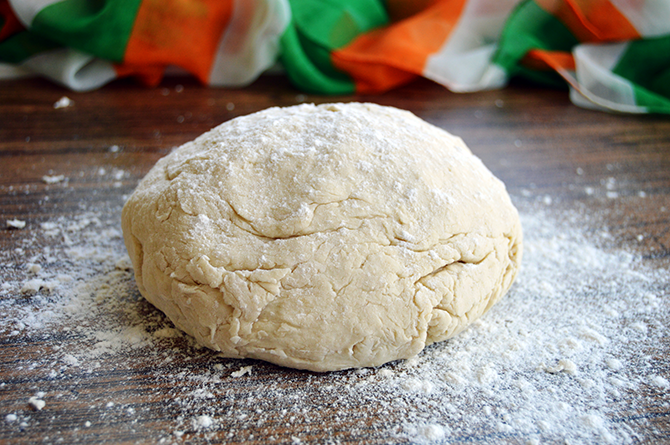
Knead and Shape
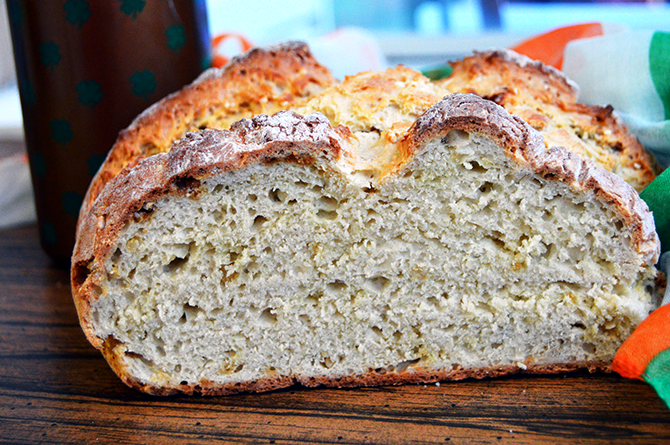
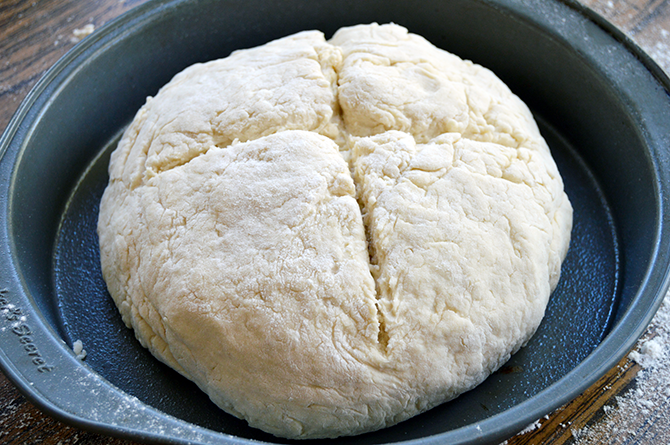
Knead the bread for just about 30 seconds to a minute on a flour-dusted surface. You’re aiming for a rough ball of dough, and don’t worry if it’s a bit wrinkled. Let’s talk about that essential ‘X’ you’ll slice just through the surface of the loaf. It’s not just for show—it actually helps the dough grow and expand!
Cooking Method
Traditionally, Irish soda bread is cooked in a cast-iron skillet. But if you don’t have one, no sweat—a shallow pan or baking sheet works too. You could even make this bread into mini soda bread muffins with a muffin tin! Bake at the appropriate temperature until it makes a lovely hollow sound when gently tapped on the bottom.
Tips & Troubleshooting for Irish Soda Bread
- Check Expiry Dates: Always make sure your baking soda and baking powder are fresh. Expired leavening agents can result in flat bread.
- Temperature Matters: Use room-temperature buttermilk and egg for better integration with the dry ingredients. Cold ingredients can inhibit rising.
- Don’t Overmix: For a tender loaf, don’t overmix the dough. Stop mixing as soon as the ingredients are combined to avoid toughening the bread.
- Flour Surface Generously: Ensure your kneading surface is well-floured to prevent sticking, but don’t go overboard or you’ll dry out the dough.
- The “X” Factor: Don’t forget to cut an ‘X’ on the top of the loaf. It’s not just traditional; it helps the inner part of the bread cook through.
- Check Doneness: To ensure the bread is fully baked, tap the bottom; it should sound hollow. If it doesn’t, give it a few more minutes in the oven.
- Avoid Soggy Bottoms: If using a baking sheet instead of a cast-iron skillet, consider lining it with parchment paper for easier removal and to avoid a soggy bottom.
- Storing Tips: Keep any leftover bread in an airtight container to prevent it from drying out quickly. If the bread feels stale, toasting can revive it.
- Moisture Check: If your dough seems too wet or too dry, adjust with a little extra flour or a splash of buttermilk.
- Quick Consumption: Irish soda bread is best consumed within 2 days of baking. If you can’t eat it fast enough, consider freezing slices for later.
Alright, Hungry People, we’ve kneaded, mixed, and baked our way to a loaf of Irish soda bread that’s practically begging to be slathered in butter. With these tips and tricks under your belt, you’re more than ready to tackle this classic recipe. Whether you’re wearing green or not, this bread is bound to make your St. Patty’s Day a touch more authentic and a whole lot tastier. Enjoy!
Homemade Irish Soda Bread
Ingredients
- 4 cups flour
- 1 ¼ cup buttermilk
- 1 egg
- 4 tablespoons butter melted
- 2 tablespoons sugar
- 1 teaspoon baking soda
- 1 teaspoon baking powder
- 1 teaspoon salt
Instructions
- Preheat the oven to 425°F. In a large bowl, whisk together the flour, sugar, baking soda, baking powder, and salt. In a smaller bowl, combine the buttermilk, egg, and melted butter.
- Create a well in the center of the dry ingredients, then pour in the wet mixture. Use a wooden spoon to stir the wet ingredients until they begin to mix with the dry ingredients, forming a sticky dough.
- When the dough can no longer be combined with a spoon, use your hands to mix in any remaining dry ingredients.
- Flour a working surface and knead the dough for about one minute or until it forms a ball.
- Grease a baking sheet or cast-iron skillet with cooking oil or butter. Gently glide a knife across the top of the bread to create an "X" shape.
- Bake the bread for 45-50 minutes, checking for doneness around the 30-minute mark. The bread should produce a hollow sound when tapped. Allow it to cool for 30 minutes before slicing.
- Serve warm or toasted with butter or marmalade. Heads up—this bread dries out in about 2 days, so make sure to enjoy it while it's fresh. Enjoy!