DIY Marshmallows: An Easy Guide to Making Them at Home
The Starving Chef is supported by Hungry People like you. When you make a purchase through an affiliate link on my site, I may earn a little bit of cash on the side (at no extra cost to you) to help keep my kitchen running. Read our disclosures here.
What’s up, Hungry People!
Let’s debunk a myth today: making marshmallows at home isn’t a culinary feat meant for the pros—it’s easier than you think! Trust me, the hardest thing about this easy homemade marshmallows recipe is resisting the urge to devour all the marshmallow fluff before it’s set and ready.
Some Marshmallow Basics
Before we dive into the how-to, there are a couple of things to keep in mind. First, give the gelatin enough time to soften. Second, get that simple syrup to just the right temp. Without these two steps down pat, you’ll end up with marshmallows that have a wonky texture. So, grab a thermometer and summon a little patience!
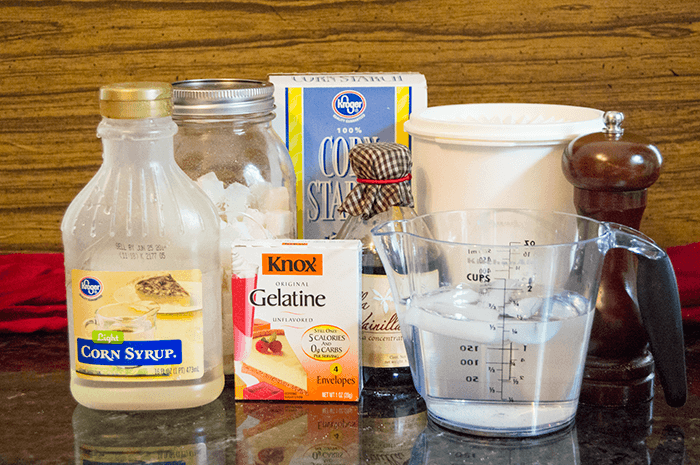
Here’s What You Need
- Gelatin: Acts as the stabilizer and gives the marshmallows their characteristic chewy texture.
- Cold Water: Used for hydrating the gelatin and dissolving the sugar in the syrup.
- Vanilla: Adds a subtle aromatic flavor to your marshmallows.
- Sugar: The primary sweetener that contributes to the body of the marshmallows.
- Light Corn Syrup: Helps prevent sugar crystals from forming, giving a smooth texture.
- Water (for syrup): Combines with the sugar and corn syrup for the perfect simple syrup.
- Powdered Sugar: Used for dusting, makes handling the finished marshmallows easier.
- Cornstarch: Combined with powdered sugar, it helps to keep the marshmallows from sticking.
- Salt: Enhances the overall flavor, balancing out the sweetness.
Let’s Cook!
Softening the Gelatin
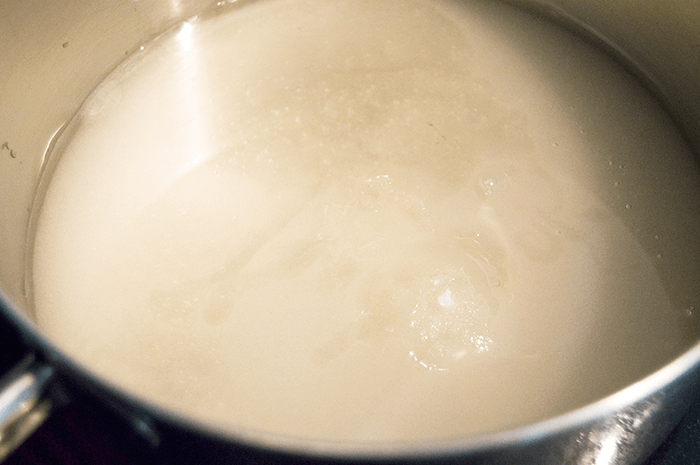
Here’s what you need for this step: just some gelatin and water. Let the gelatin chill out and soften for about 20 minutes. My first time using gelatin felt like a mini science experiment—I wasn’t sure what would happen when I tossed that packet into the water. Within seconds, the gelatin started expanding like magic. By the way, if anyone knows whether you’re supposed to stir gelatin into water, hit me up. It didn’t mess with my marshmallows, but it’s a cooking riddle I’d like solved.

Perfecting the Simple Syrup
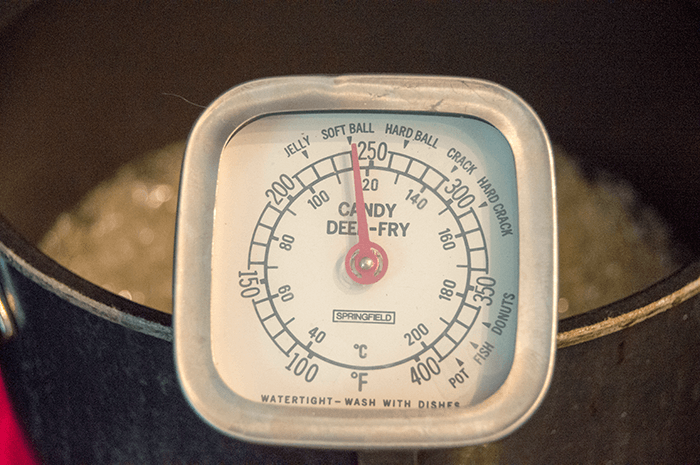
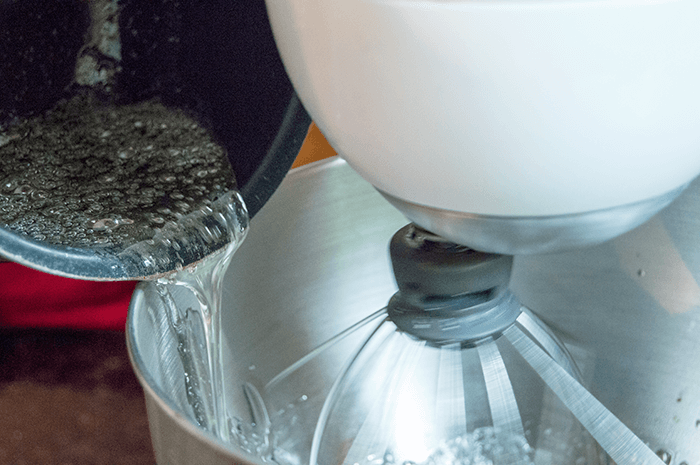
While the gelatin is doing its thing, you’ll want to get a sugar-water concoction heating up in a pan on high. It’s thermometer time! You want that mix to reach exactly 240°F. Any cooler, and your marshmallows will have commitment issues; they won’t set. Go hotter, and you’re making marshmallow rocks. And who wants that?
Whip It Good!
Once you’ve nailed that sweet 240°F, it’s time to pour the hot syrup into a stand mixer cranked up to medium-high. But don’t rush—pour it in slowly and steadily.
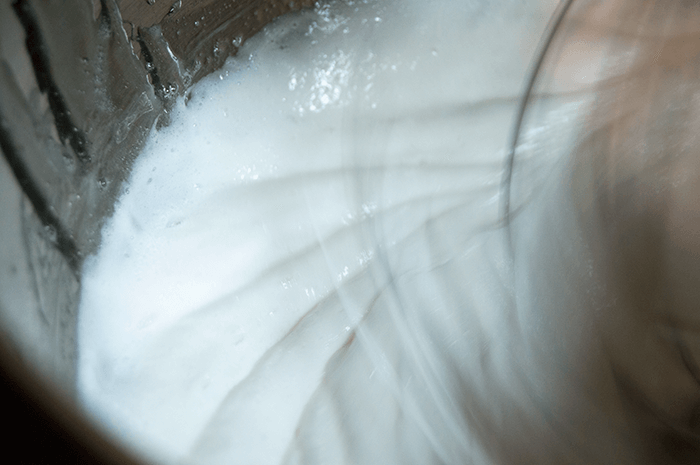
Then, whip the syrup and gelatin combo until it turns creamy and white, which should take about 5-10 minutes. After around 15 minutes, you should see it forming peaks. Keep going; you’re almost there!
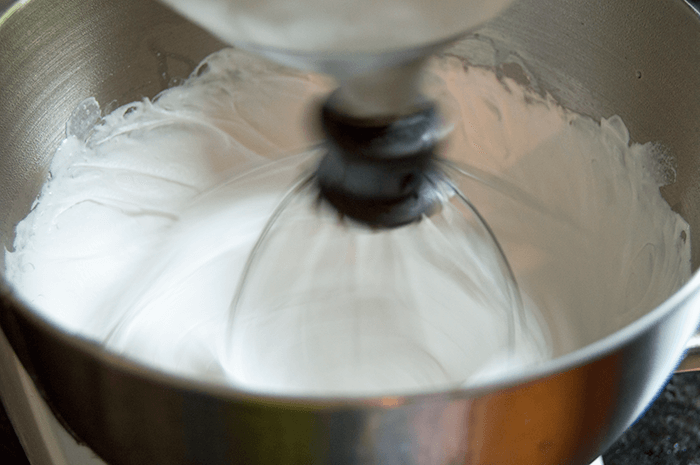
More Whipping, More Fluff
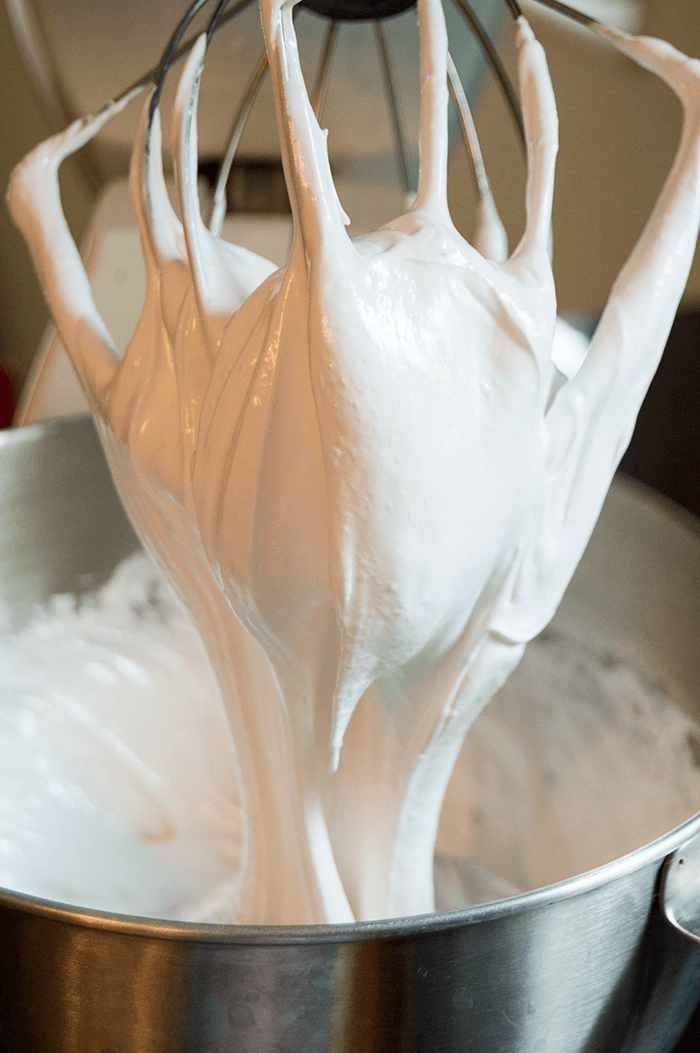
The mix will start to double in size, and let’s just say, things are going to get pretty voluminous in there. What you’ll have is marshmallow fluff! If you can, resist the urge to eat it straight out of the bowl; we’re almost at the finish line.
Setting the Stage for Marshmallow Heaven
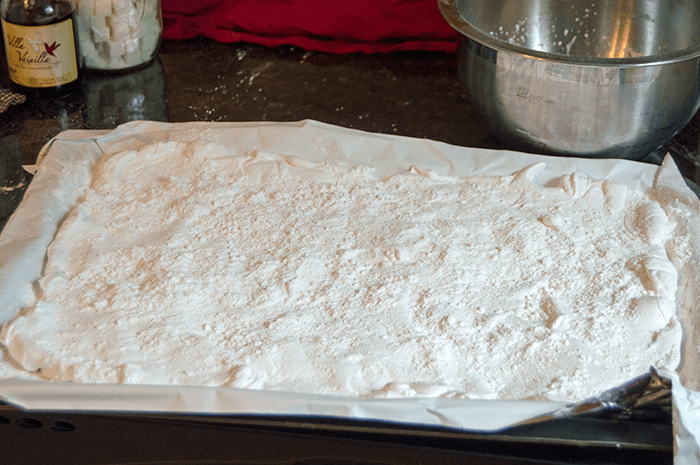
Here’s what you need: a baking sheet, parchment paper, and some powdered sugar. Dust your prepared sheet with powdered sugar and pour your fluffy, freshly-whipped marshmallow mix onto it, spreading it into a consistent layer.
The key here is to make sure whatever pan you’re using is properly lined; we’re dealing with something stickier than a Spider-Man reboot.
The Waiting Game
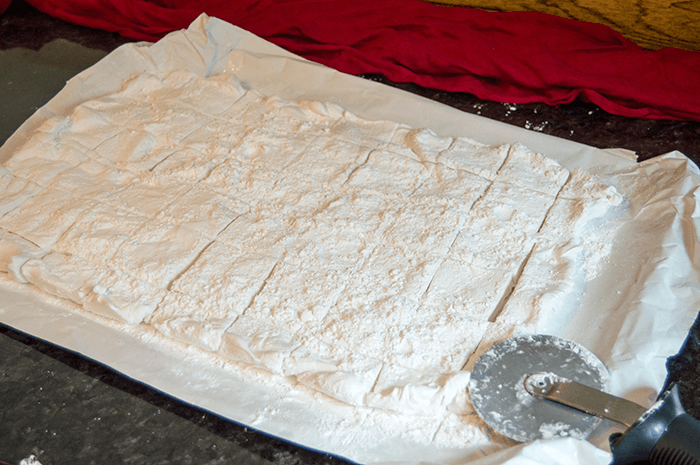
After you’ve successfully poured and spread, let your marshmallows set for about four hours. They’ll firm up enough to hold their shape when you cut ’em, but they’ll still boast that incredible homemade fluffiness on the inside.
Tips for Making Easy Homemade Marshmallows
- Gelatin Handling: If you’ve never worked with gelatin before, don’t worry about whether to stir or not; it won’t affect your end result much.
- Temperature Accuracy: A candy thermometer is your best friend for getting the syrup to 240°F.
- Consistent Pour: When adding the hot sugar water to the gelatin, pour it in a slow and steady stream to avoid lumps.
- The Whipping Time: Don’t cut the whipping time short; this is crucial for getting the right texture.
- Line Your Pan: Make sure you properly line your pan with parchment paper or a generous layer of cooking spray to handle the stickiness.
- Setting Time: Patience is key; allow 4 to 5 hours for your marshmallows to set properly.
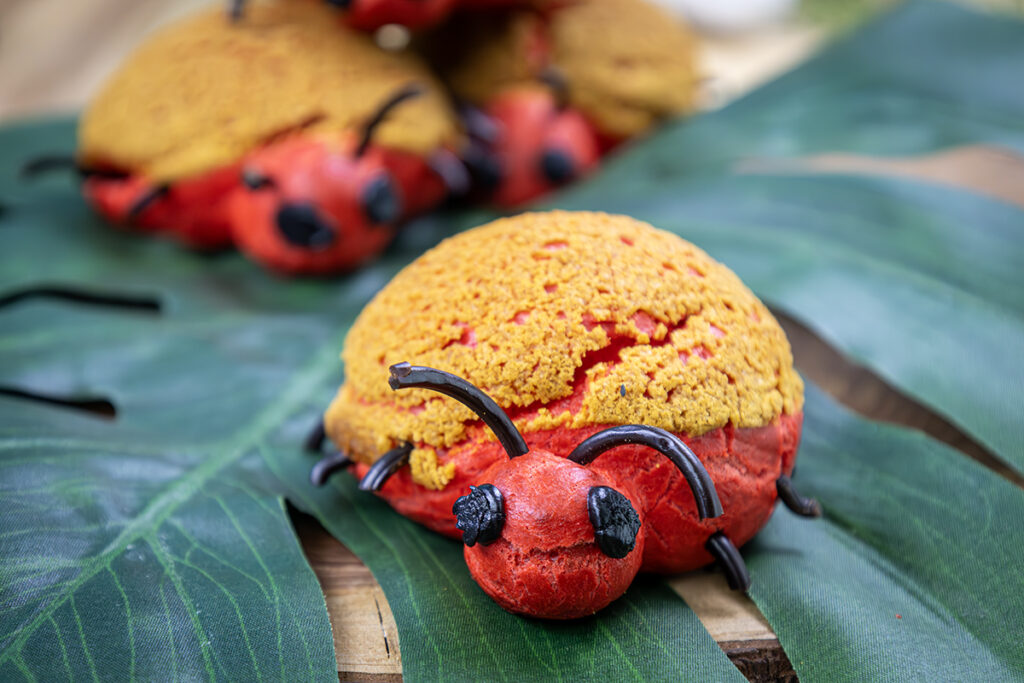
- Cutting Shapes: Use a greased knife or cookie cutters for more creative shapes.
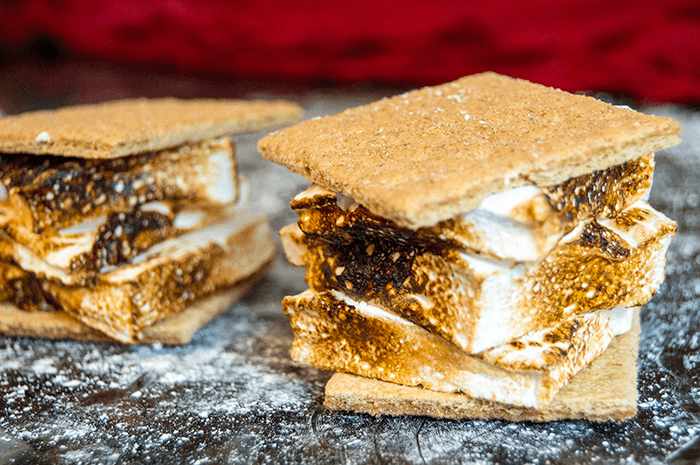
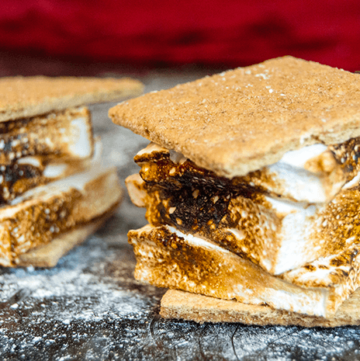
- Speedy Melting: Homemade marshmallows melt faster than store-bought, so keep a close eye when using them in s’mores.
Campfire Ready, but Keep an Eye Out!
These homemade gems are perfect for your next campfire gathering, but heads up: they melt a lot faster than the store-bought ones. If s’mores are on the agenda, make sure you’re watching these marshmallows like a hawk.
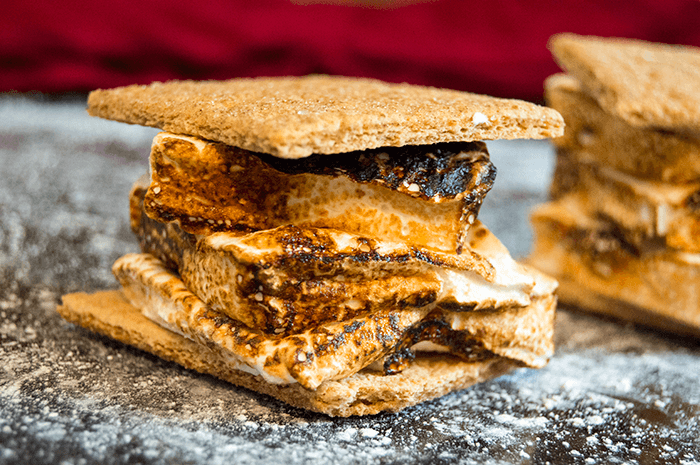
And that’s it Hungry People, we’ve just whipped up a batch of easy homemade marshmallows, and let me tell you, it’s a game-changer. Once you try these fluffy, sweet little clouds, you’ll never want to go back to store-bought. Plus, they make s’mores even more amazing! Give this recipe a whirl; it’s the perfect combo of simple, affordable, and downright fun to make.
Easy Homemade Marshmallows
Ingredients
- 3 packets gelatin
- 1 ½ cups cold water
- 1 teaspoon vanilla
- 1 ½ cups sugar
- ½ cup light corn syrup
- ¾ cup water
- 1 ½ cup powdered sugar
- ½ cup cornstarch
- pinch salt
Instructions
- Pour the gelatin packets into the cold water in a bowl mounted to a stand mixer. Let the gelatin soften and expand for about 20 minutes. Add the optional vanilla flavoring.
- While the gelatin is softening, combine the sugar, ¾ cup of water, and corn syrup in a pan over high heat. Stir to dissolve the sugar, then bring the temperature up to 240°F.
- Turn the mixer on and slowly pour the hot liquid into the softened gelatin. Once all the liquid has been added, turn the mixer up to medium-high speed. Season with a pinch of salt.
- After about five minutes, the gelatin and sugar mixture will turn white. Continue to whip. At around the 10-minute mark, the mix will start forming peaks and begin to increase in volume. Whip for another 10 minutes or until the mixture is light, sticky, and super fluffy.
- Line a pan or baking sheet with parchment paper (or use cooking spray). Whisk together the powdered sugar and cornstarch and dust the lined pan.
- Pour the marshmallow fluff onto the sheet in an even layer. Dust the top with the remaining powdered sugar mixture.
- Let the marshmallows set for about 4 to 5 hours. Cut them into the desired shape and size and serve alongside chocolate squares and graham crackers for DIY s'mores. Enjoy!