Cake Pop Bouquet for Valentine’s Day
The Starving Chef is supported by Hungry People like you. When you make a purchase through an affiliate link on my site, I may earn a little bit of cash on the side (at no extra cost to you) to help keep my kitchen running. Read our disclosures here.
What’s Up, Hungry People
If you’re on the hunt for a homemade gift that screams “I went all out for you” this Valentine’s Day, why not whip up something that’s both sweet and thoughtful? Sure, anyone can pick up a box of chocolates, but it takes a special kind of dedication to bake something from the heart.
You’re in luck because turning truffles from your go-to cake mix into a masterpiece is simpler than you think!
Around here, we fondly dub them ‘cake pops,’ but let’s not get hung up on names. I took a little creative liberty this time by starting with some leftover vanilla cake from my strawberry shortcake kabobs. But here’s the kicker: these aren’t your average truffles; they’re concealing a sneaky surprise – a Snickers filled heart!
You can follow any cake pop recipe you prefer for the base; you’re here to master the art of crafting roses for a grand occasion. Today, we’re zeroing in on those roses, so let’s put the recipe book aside for a moment.
Here’s What You Need:
- Favorite box cake mix: Serves as the base of the truffles, offering a quick and customizable flavor foundation.
- Ingredients required on box: These are typically eggs, oil, and water, which bind, moisten, and activate the cake mix.
- Cream cheese: Adds richness and moisture, helping the cake balls hold their shape.
- Candy melts: Provide a colorful and flavorful coating, adding texture and visual appeal.
- Fondant: Used for crafting decorative flowers, offering a pliable and edible decoration.
Let’s Cook!
Crafting these truffles is a journey, especially the handmade roses part. It’s a good idea to block off some time for this – think of it as a craft project and a baking mission rolled into one. (Fun fact: I managed to create about two dozen fondant roses while rewatching the extended Lord of the Rings: The Fellowship of the Ring with my boyfriend. How’s that for multitasking?)
There’s more than one path to rose perfection. You can opt for store-bought fondant (no judgment here, that’s what I did) or, if you’re feeling bold, make your own from scratch.
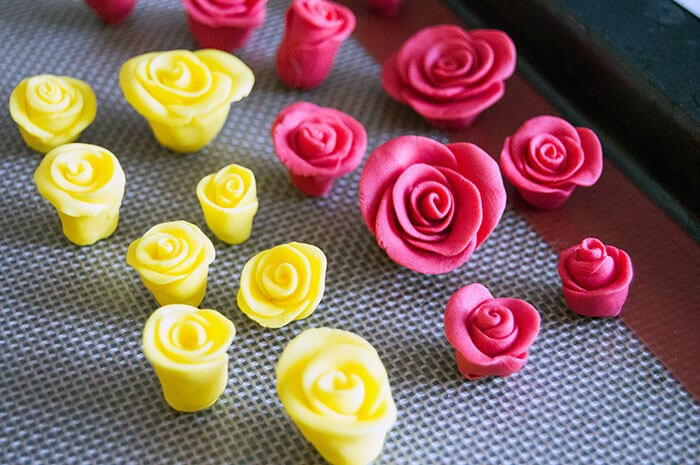
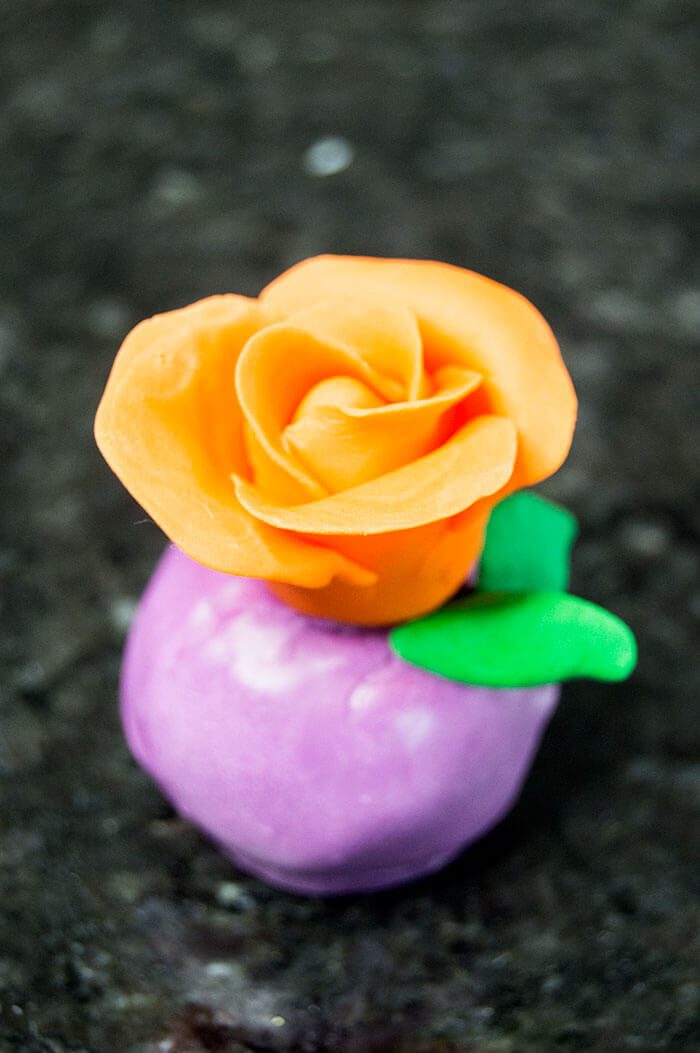
I had a rainbow of fondant leftover from my Pokémon GO cupcakes, so I got creative with the colors.
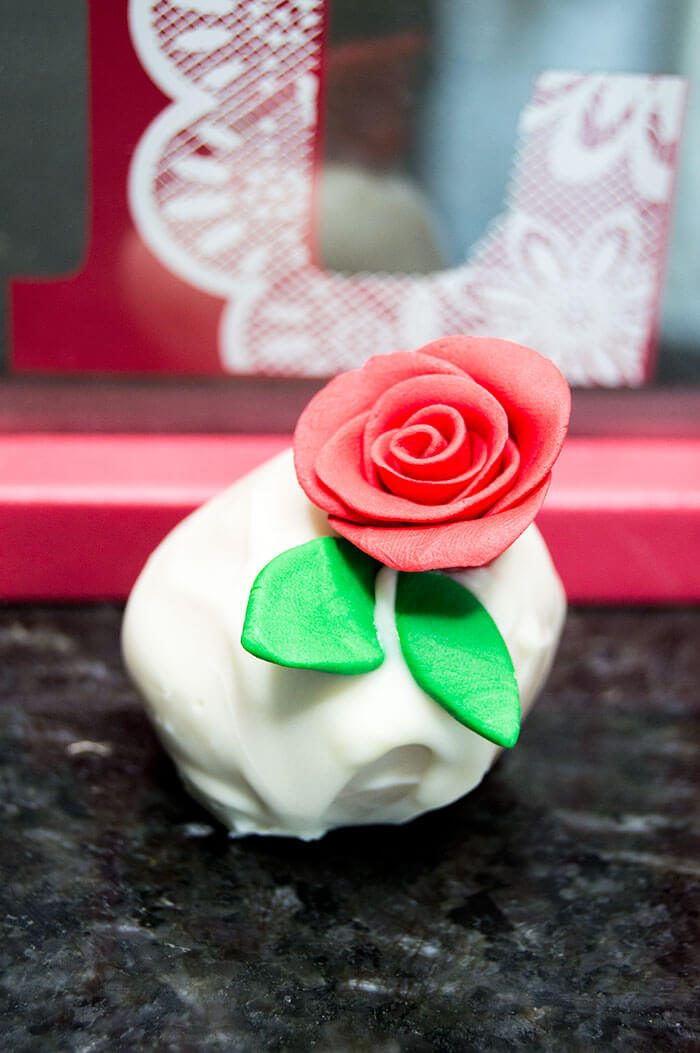
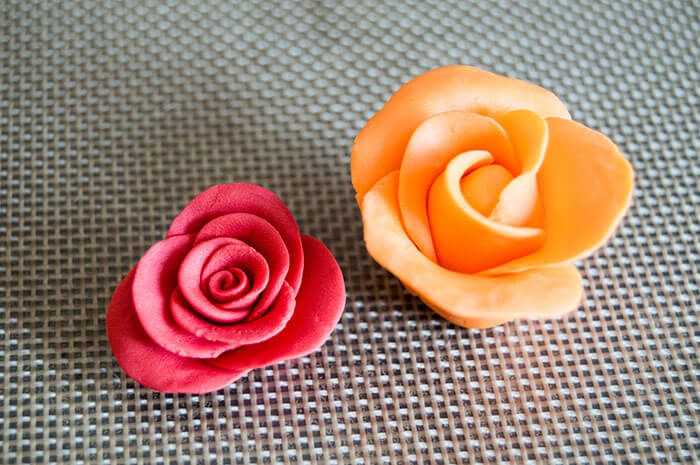
Fondant Flowers Method #1 – Cut & Roll
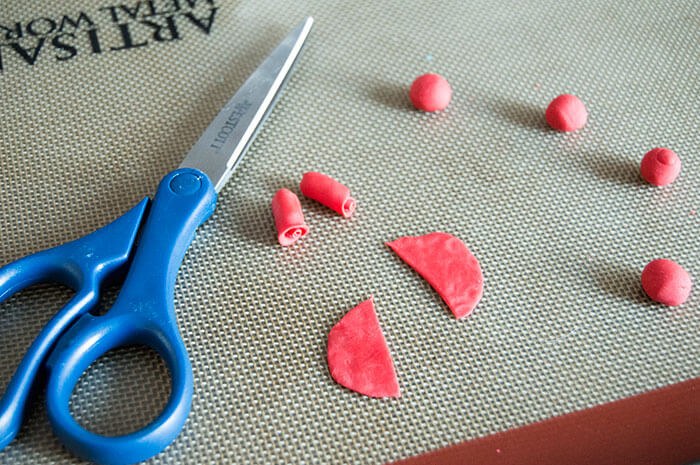
The first method I tried turned out to be my favorite. I used a rose red fondant and pinched off little balls that I could flatten between my fingers to be about the size and width of a quarter.
I then cut each circle in half and rolled it into a little cylinder.
To make the rest of the petals, I repeated flattening the little balls into circles, cut each in half again, then rolled each half around the cylinder shape. I did this again and again until I was satisfied with the size and shape of the rose.
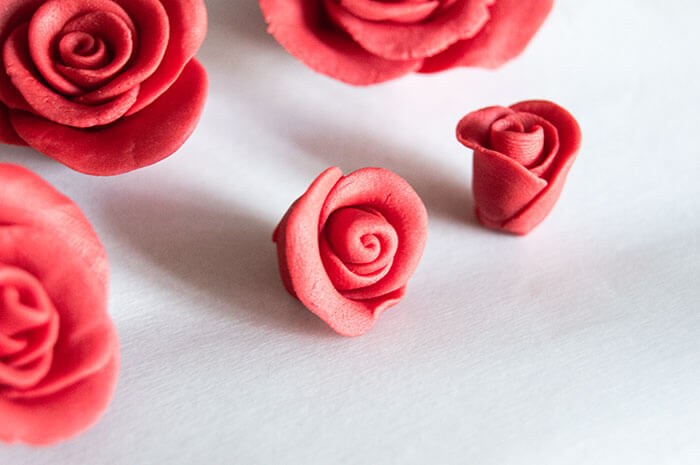
For a realistic look, I pinched the outer petals to be a bit thinner on the edges and curled them back juuuust a tiny bit. While this method definitely took the longest, I think it achieved the most beautiful roses.
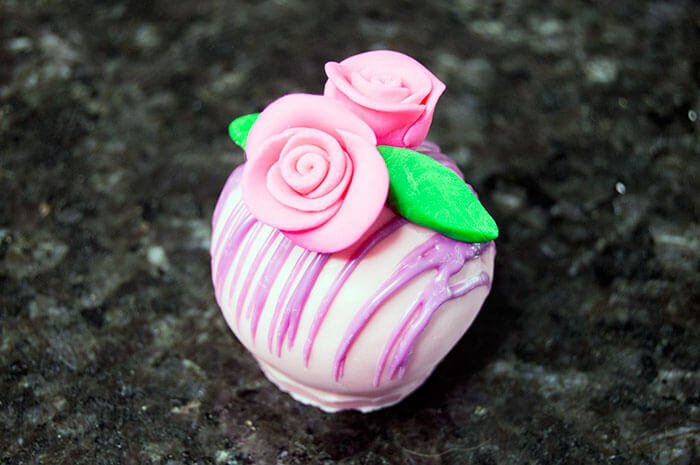
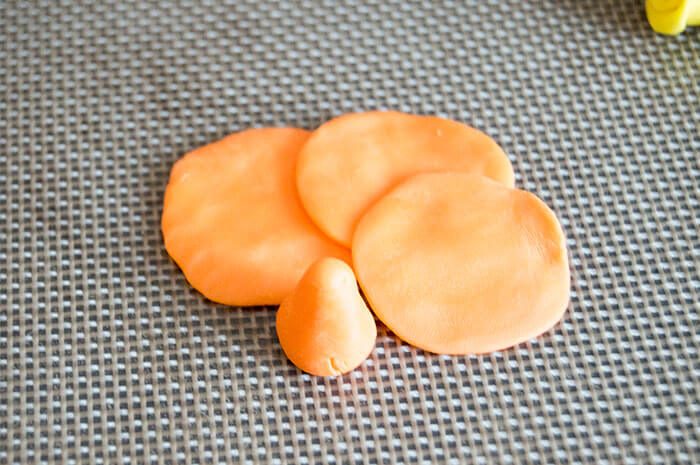
Fondant Flowers Method #2 – Cone & Roll
Another way you can make fondant roses – much quicker and simpler than the last method – is to create a small cone shape for the center of the rose, then roll flattened fondant circles around the cone in an overlapping pattern.
It was kind of hard to photograph the best way to do this, but essential, you overlap the flattened circles and place where they all intersect into the side of the cone.
Then tuck the last layer under the first.
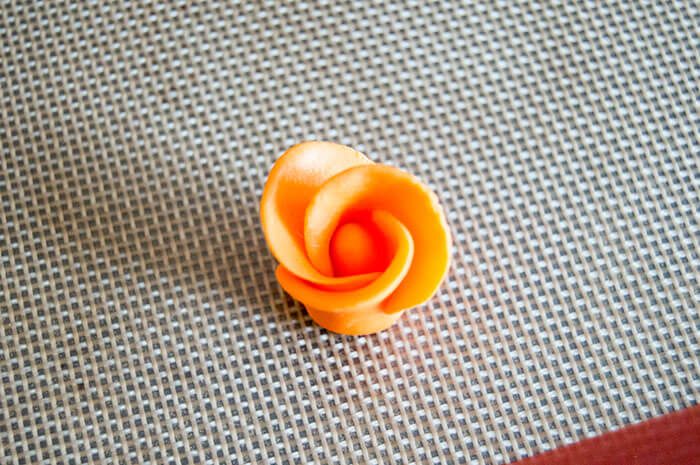
For a larger flower, create a few more flattened circles and roll them around the petal covered cone. This gives you two layers of petals.
It’s a slightly quicker and easier method to individually rolling each center and makes a more tropical looking flower.
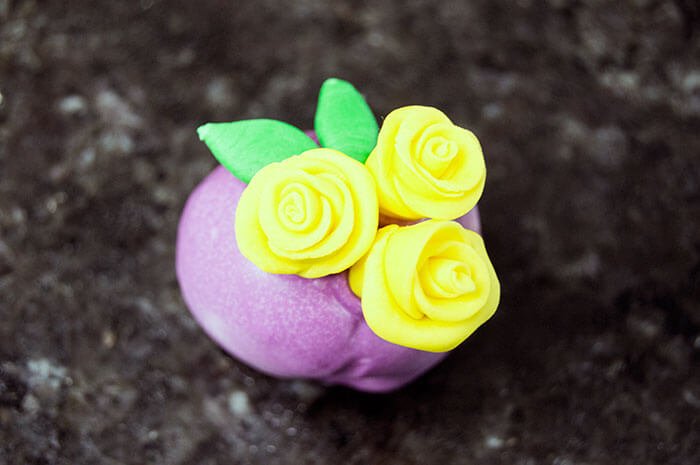
Fondant Flowers Method #3 – Use a Cookie Cutter
Finally the easiest method is to use a flower shaped cookie cutter. I was dead set on making more roses in the prettiest, simplest way.
I used the smallest flower shaped cutter, then cut each piece of rolled and cut fondant in half.
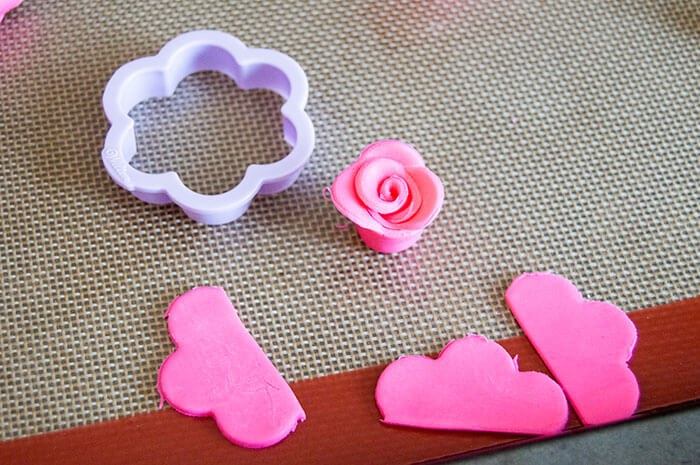
This method was by far the quickest, as all you need to do from there is roll up the flower! I made sure to roll mine so that the petals didn’t line up to create a more realistic appearance, then pinched the edges thinner to stand out further.
Truffle Making Tips:
- Choosing the right cake mix: Opt for a cake mix flavor that complements your candy melts and fondant colors. This not only ensures a visually appealing result but also a harmonious blend of flavors. For instance, a vanilla or yellow cake mix pairs well with almost any color or flavor of candy melts.
- Achieving smooth cake balls: To get smooth, even cake balls, ensure your cake is completely cooled before crumbling. If the mixture is too crumbly or dry, adding a bit more cream cheese can help it stick together better. However, be careful not to add too much, as this can make the mixture too wet and difficult to shape.
- Melting candy melts properly: Candy melts can be temperamental. To avoid burning them, melt them in short intervals in the microwave, stirring in between, or use a double boiler on low heat. If the candy melts are too thick, a bit of coconut oil or vegetable shortening can help thin them out for a smoother coating.
- Working with fondant: Fondant can dry out quickly, so work in small batches and keep the rest covered. If the fondant becomes too stiff, kneading it with a bit of shortening can help make it pliable again. For more intricate flower designs, using tools like a ball tool or foam pad can help shape petals more naturally.
- Chilling is key: Chilling the cake balls before dipping them in candy melts helps prevent them from falling apart during the dipping process. Similarly, chilling the coated truffles before adding fondant decorations ensures the candy shell is set and provides a stable base for decorations.
- Securing fondant decorations: A tiny dab of melted candy acts as the perfect “glue” to attach fondant decorations to the truffles. If the fondant decorations are heavy or complex, consider chilling them slightly before attaching to ensure they hold their shape and stay in place.
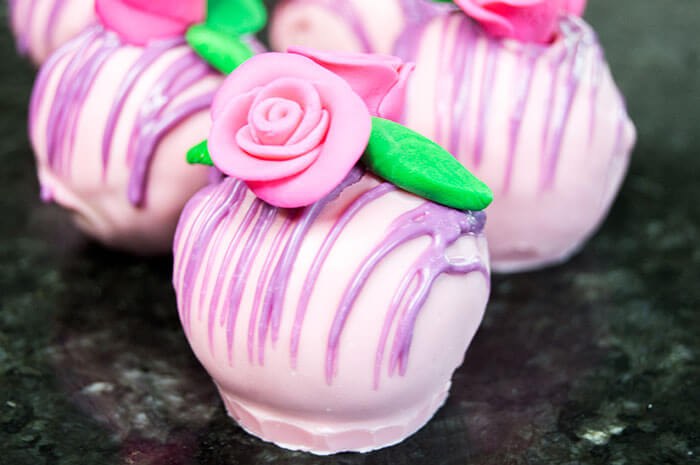
No matter which route you choose, these truffles are bound to capture the heart (and stomach) of your Valentine. Making fondant roses might seem like a feat of magic, but I promise, it’s all in the technique – and a bit of patience.
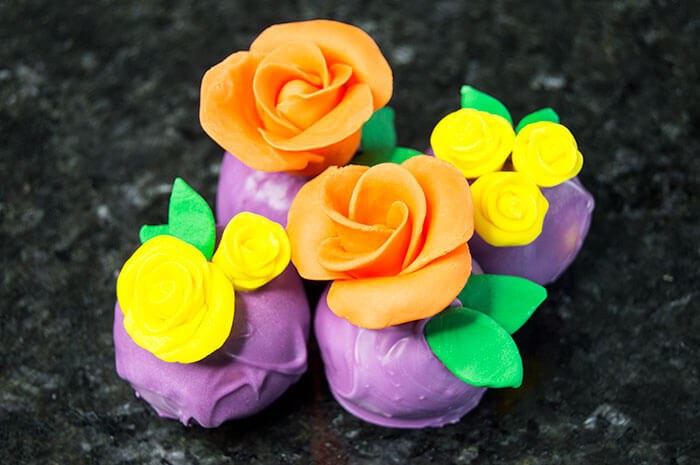
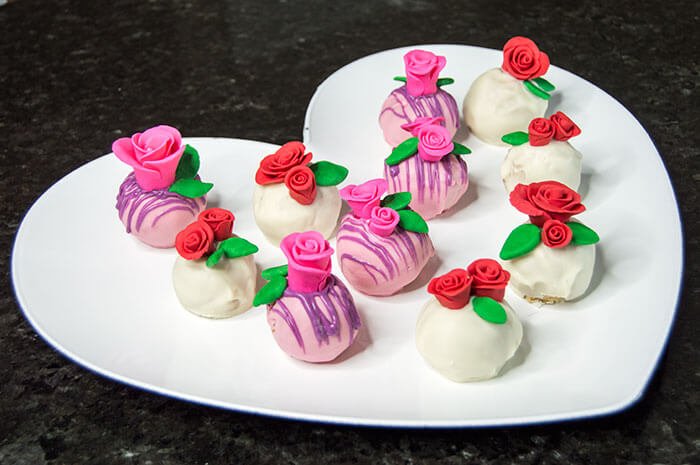
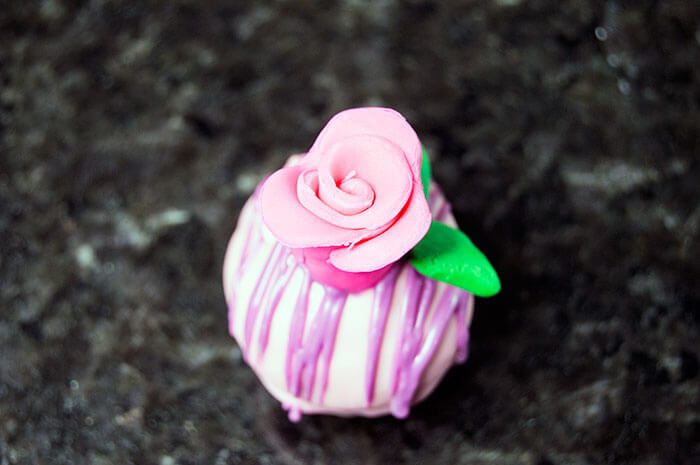
To finish, I attached each rose to the truffles after dipping them in a rainbow of colored candy melts, creating a bouquet effect that’s as delicious to eat as it is to look at. Or go for the single rose approach – topped with a kiss for good measure.

Happy Valentine’s Day!
Whether you’re aiming to impress your sweetheart, show some love to your pals, or just treat yourself to a sweet craft, this recipe is your go-to. Remember, the joy of baking is all about adding your personal flair, so feel free to play around with different flavors and hues.
And if your first rose looks a bit more like a whimsical tulip, just laugh it off—it’s the thought (and the flavor) that truly counts.
Here’s to making your Valentine’s Day a tad sweeter with a bouquet that’s delightfully edible. Enjoy, and keep on baking!
Cake Pop Bouquet for Valentine’s Day
Equipment
- scissors
Ingredients
- 1 box favorite box cake mix + ingredients required on box
- 8 oz cream cheese
- 3 cups candy melts varying colors of choice
- 16 oz fondant varying colors of choice for flowers
Instructions
- Bake the cake according to the instructions on the box. Let it cool completely. I recommend making the cake a day ahead of time to ensure it's thoroughly cooled.
- Crumble the cake into fine pieces and use a hand mixer to combine the cake crumbs with the cream cheese. Use a measuring spoon to scoop out 1 tablespoon of the mixture. Compress and roll it between your palms to create a ball shape. Chill the cake balls for one hour in the refrigerator.
- Melt the candy melts in the microwave or use a double boiler method. Dip the chilled cake balls into your desired candy melt colors. Allow the excess candy melts to drip off before placing the coated cake balls on a baking sheet lined with silicone or parchment paper. Chill the cake balls until the coating has hardened.
- Roll out the fondant on a clean surface. Use a petal or flower-shaped cookie cutter to cut out the petal shapes. To form the roses, either cut the petals accordingly and roll a small ball of fondant to layer the petals around, or roll the fondant into cylinders and layer on the petals to create roses. For detailed instructions, refer to the pictures provided in the post.
- Assemble the truffles by securing the roses to the tops of each truffle with a tiny dab of melted candy. Enjoy!